BEST Baked Cauliflower “Mac” and Cheese
This post may contain affiliate links. Please read our disclosure policy.
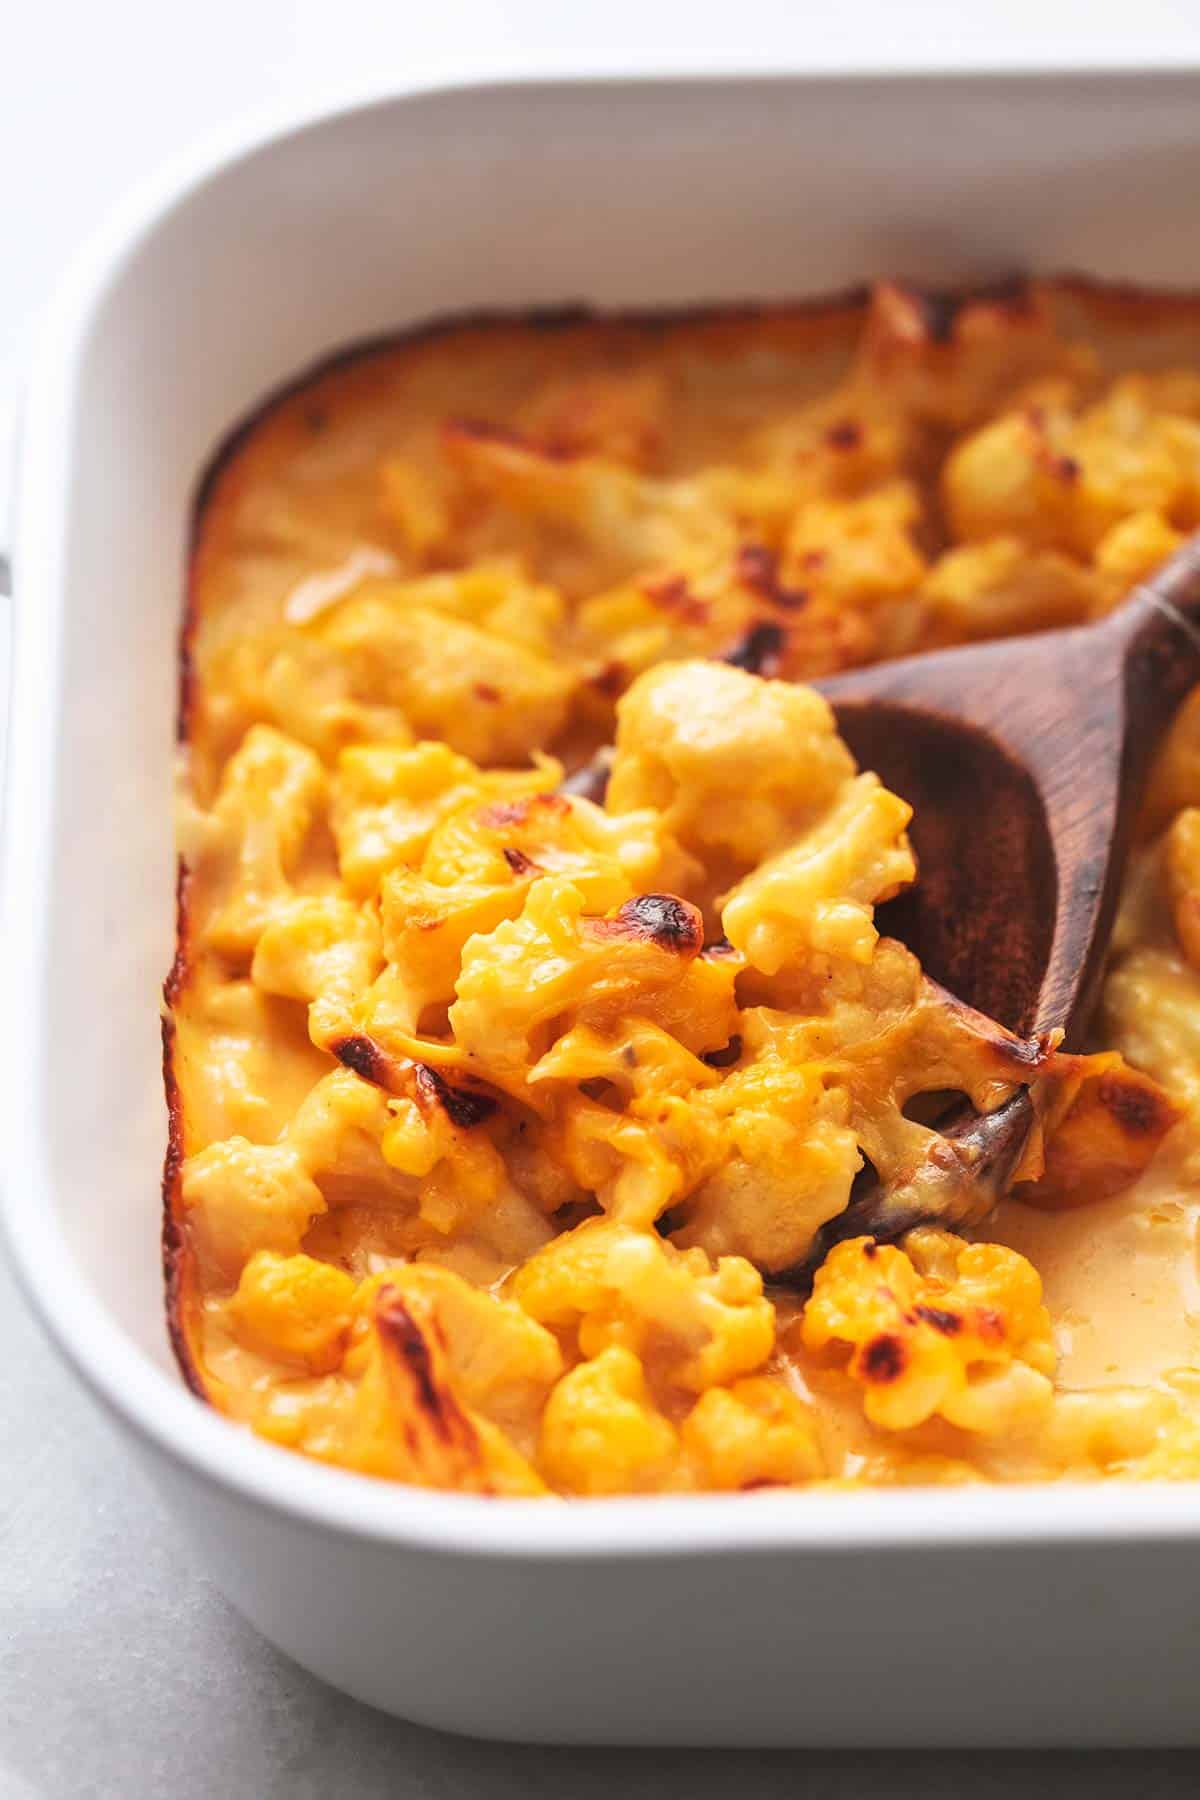
You’ll never miss the “mac” in this delicious Cauliflower Mac and Cheese dish! Cheesy, buttery, ooey, gooey, and comforting, this recipe is a great way to get a serving of veggies and your pasta fix without the heavy carbs.
Looking for all the cauliflower everything? Try these recipes for Easy Buffalo Cauliflower, Roasted Cauliflower Soup, and Baked Sweet and Sour Cauliflower.
Why This Recipe Works
Cauliflower — I know this goes without saying because how would this recipe work without cauliflower but it truly has been a game-changer for me when cooking, knowing there’s this versatile veggie I can use instead of pasta, potatoes, rice…so many other things. It’s fun to mix it up once in a while and having an extra serving or two of veggies never hurt anybody.
Hand-shredded cheese — I’m all about the kind of shredded cheese you shred yourself. Why? Well store-bought shredded cheese is coated with this powdery substance that keeps it from all caking together in the bag. That substance that keeps it from caking also keeps it from melting together well and leaves the cheese with a grainy taste and texture. Do yourself a favor and grate it yourself — it’s even more economical that way too.
That roux — You have to make a roux (butter/flour mixture detailed below) to get the cheese to fold in correctly and melt smoothly and consistently. I’ve skipped this step before and what you end up with is cauliflower with melted cheese pieces stuck to it. Definitely not creamy and cauliflower mac and cheese – like at all.
Leftovers — This recipe heats up well the next day and the day after too (if you have any left, that is). Mac and cheese for daaaays.
Here’s How You Make It
- First, set the oven to 375 degrees to preheat it. (not pictured)
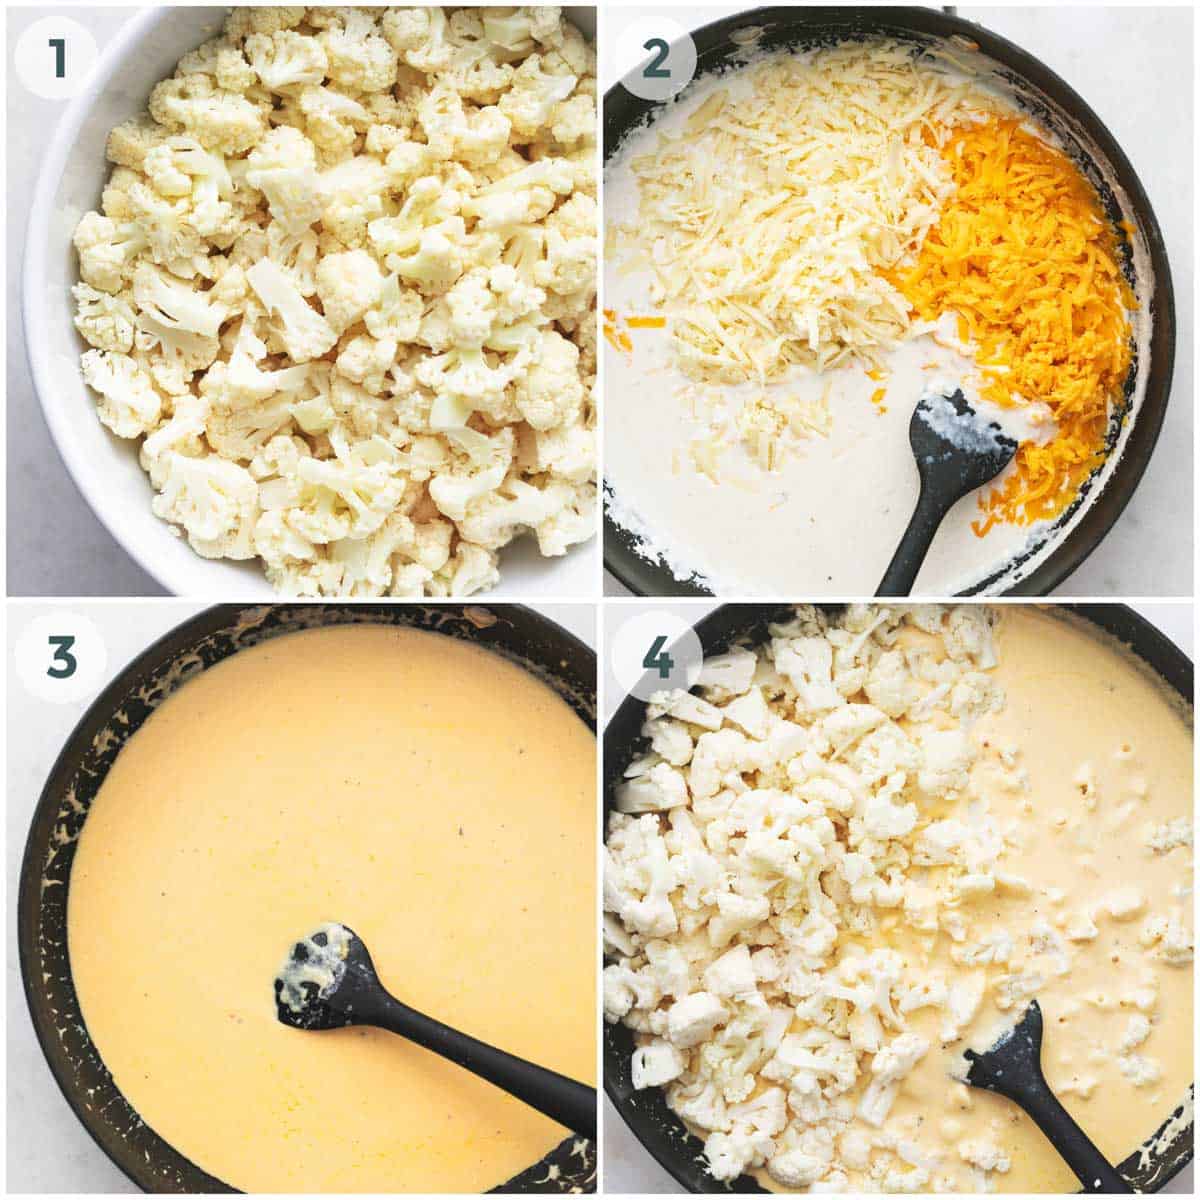
- Steam the cauliflower in the microwave by filling a microwave-safe bowl with about an inch of water, then the cauliflower and popping in the microwave for 8 minutes. Carefully drain the water out of the bowl and set aside. (photo 1)
- In a large saucepan over medium-high heat, melt the butter. (not pictured)
- Stir the flour into the melted butter for about 3 minutes, stirring continuously to make a roux. (not pictured)
- Now whisk in the milk into the flour/butter mixture a little bit at a time until the milk is totally incorporated and the mixture thickens and is smooth. (not pictured)
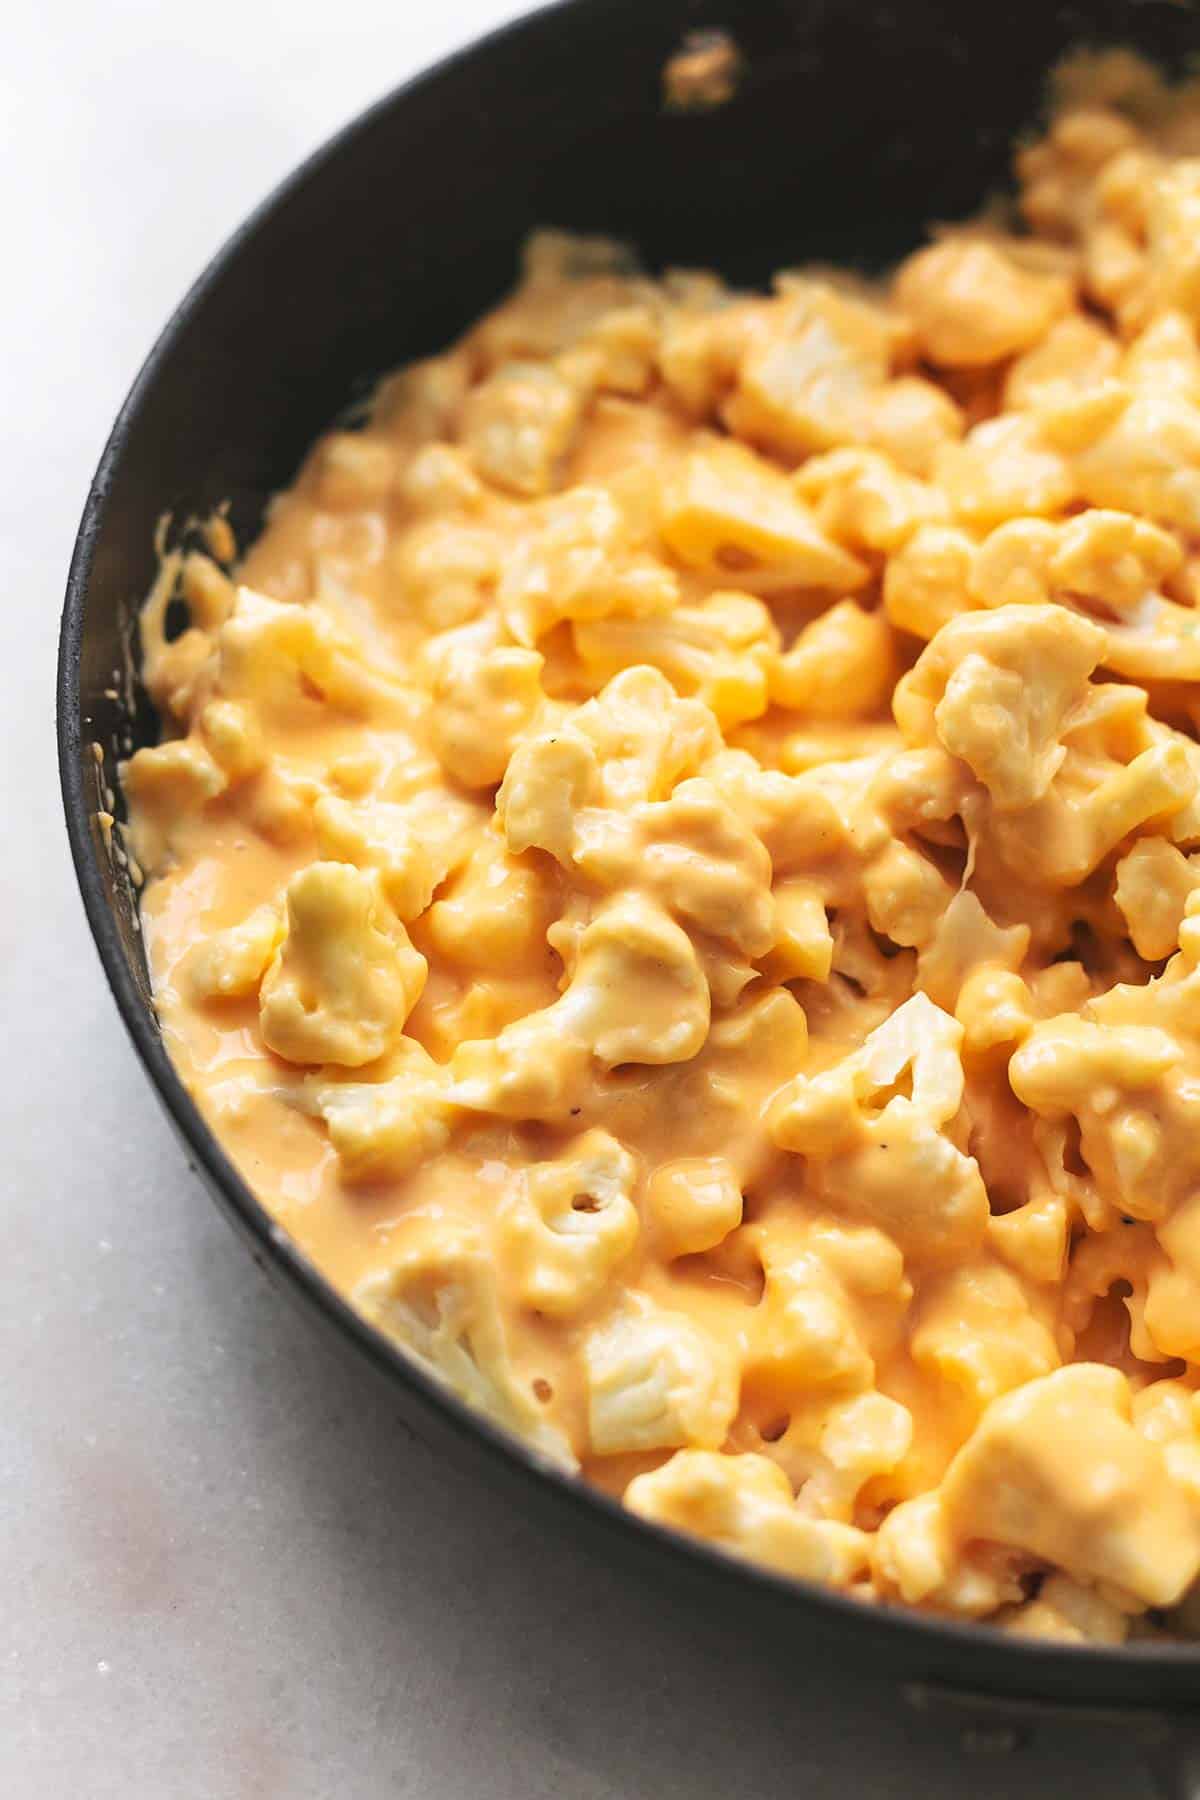
- Take the saucepan off the heat, and stir in the garlic powder, salt, pepper, and shredded cheese until that’s thoroughly melted and smooth as well. (photo 2-3)
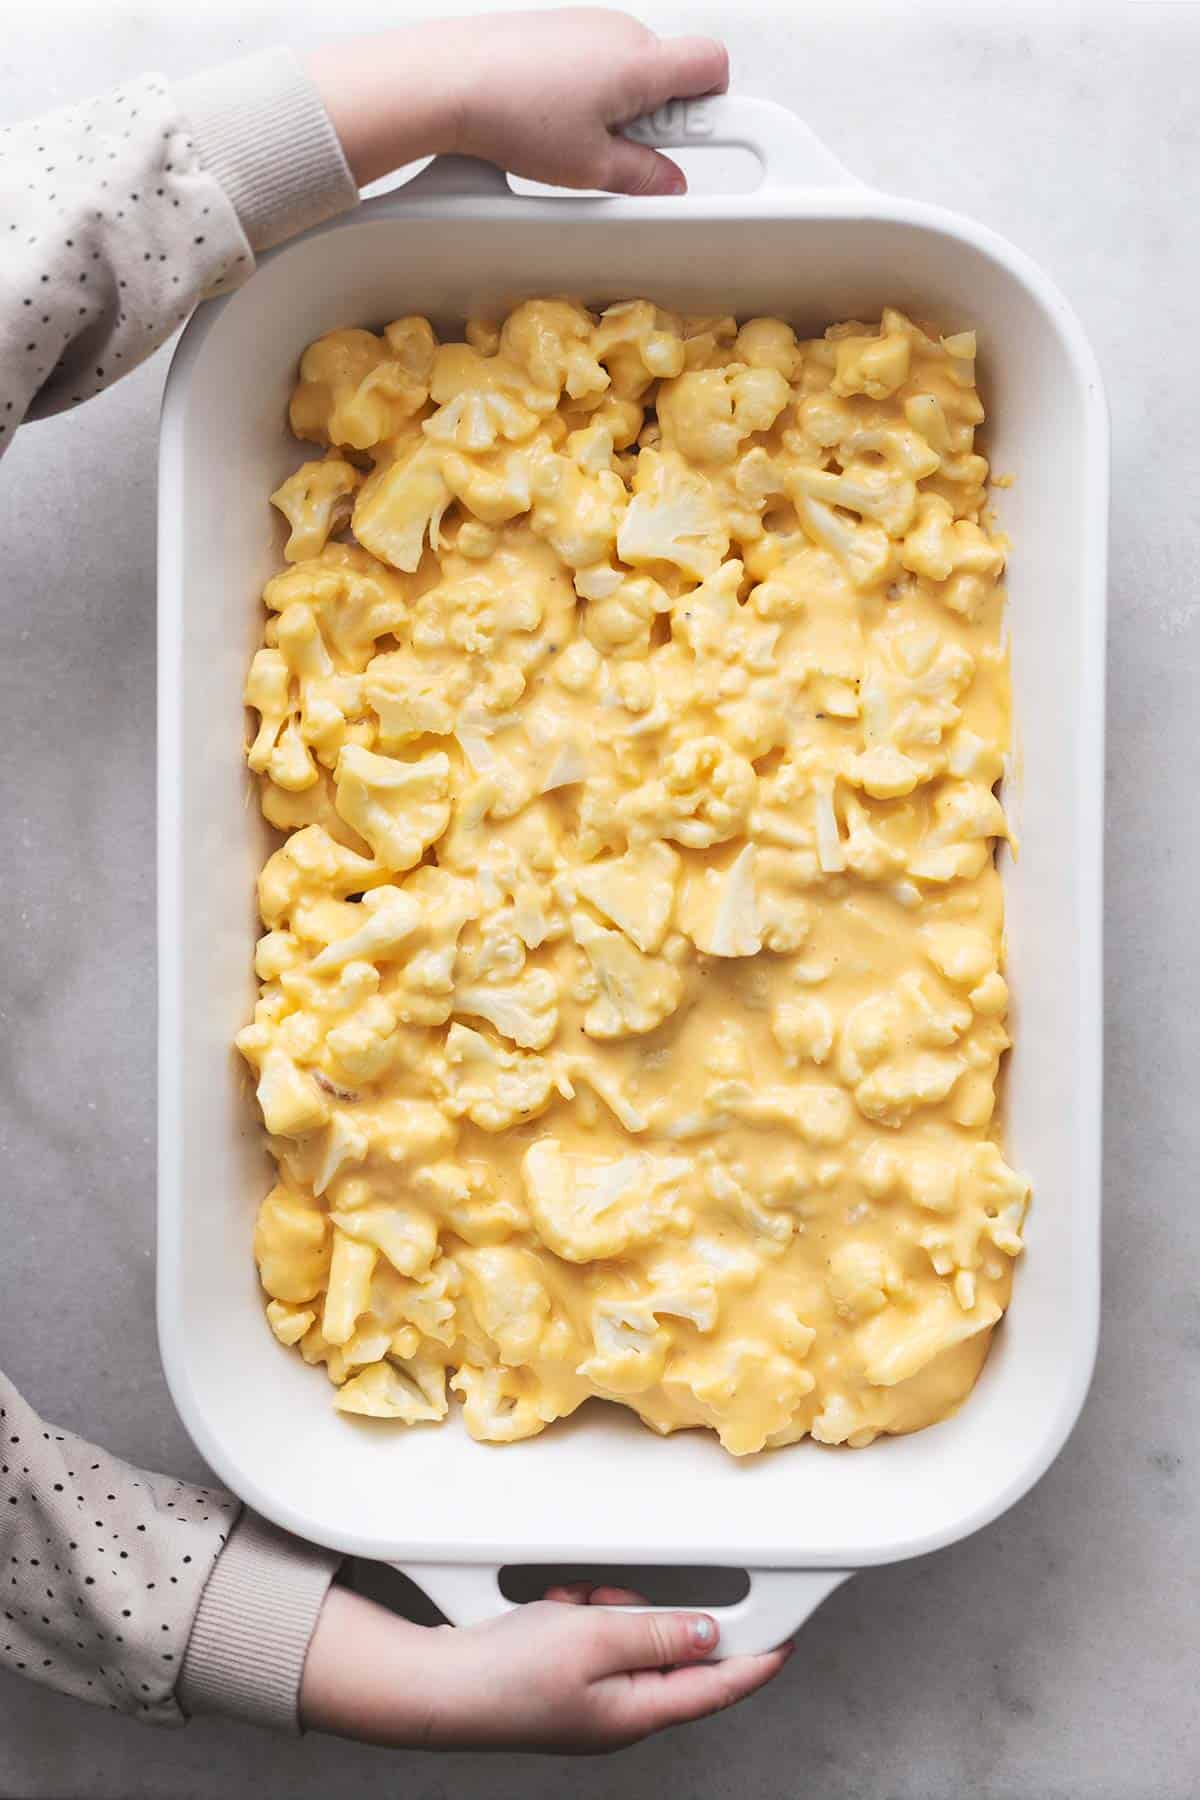
- Add the cauliflower to the cheese in the saucepan, stir it all together and pour it into a prepared 9×13-in. baking dish. (photo 4)
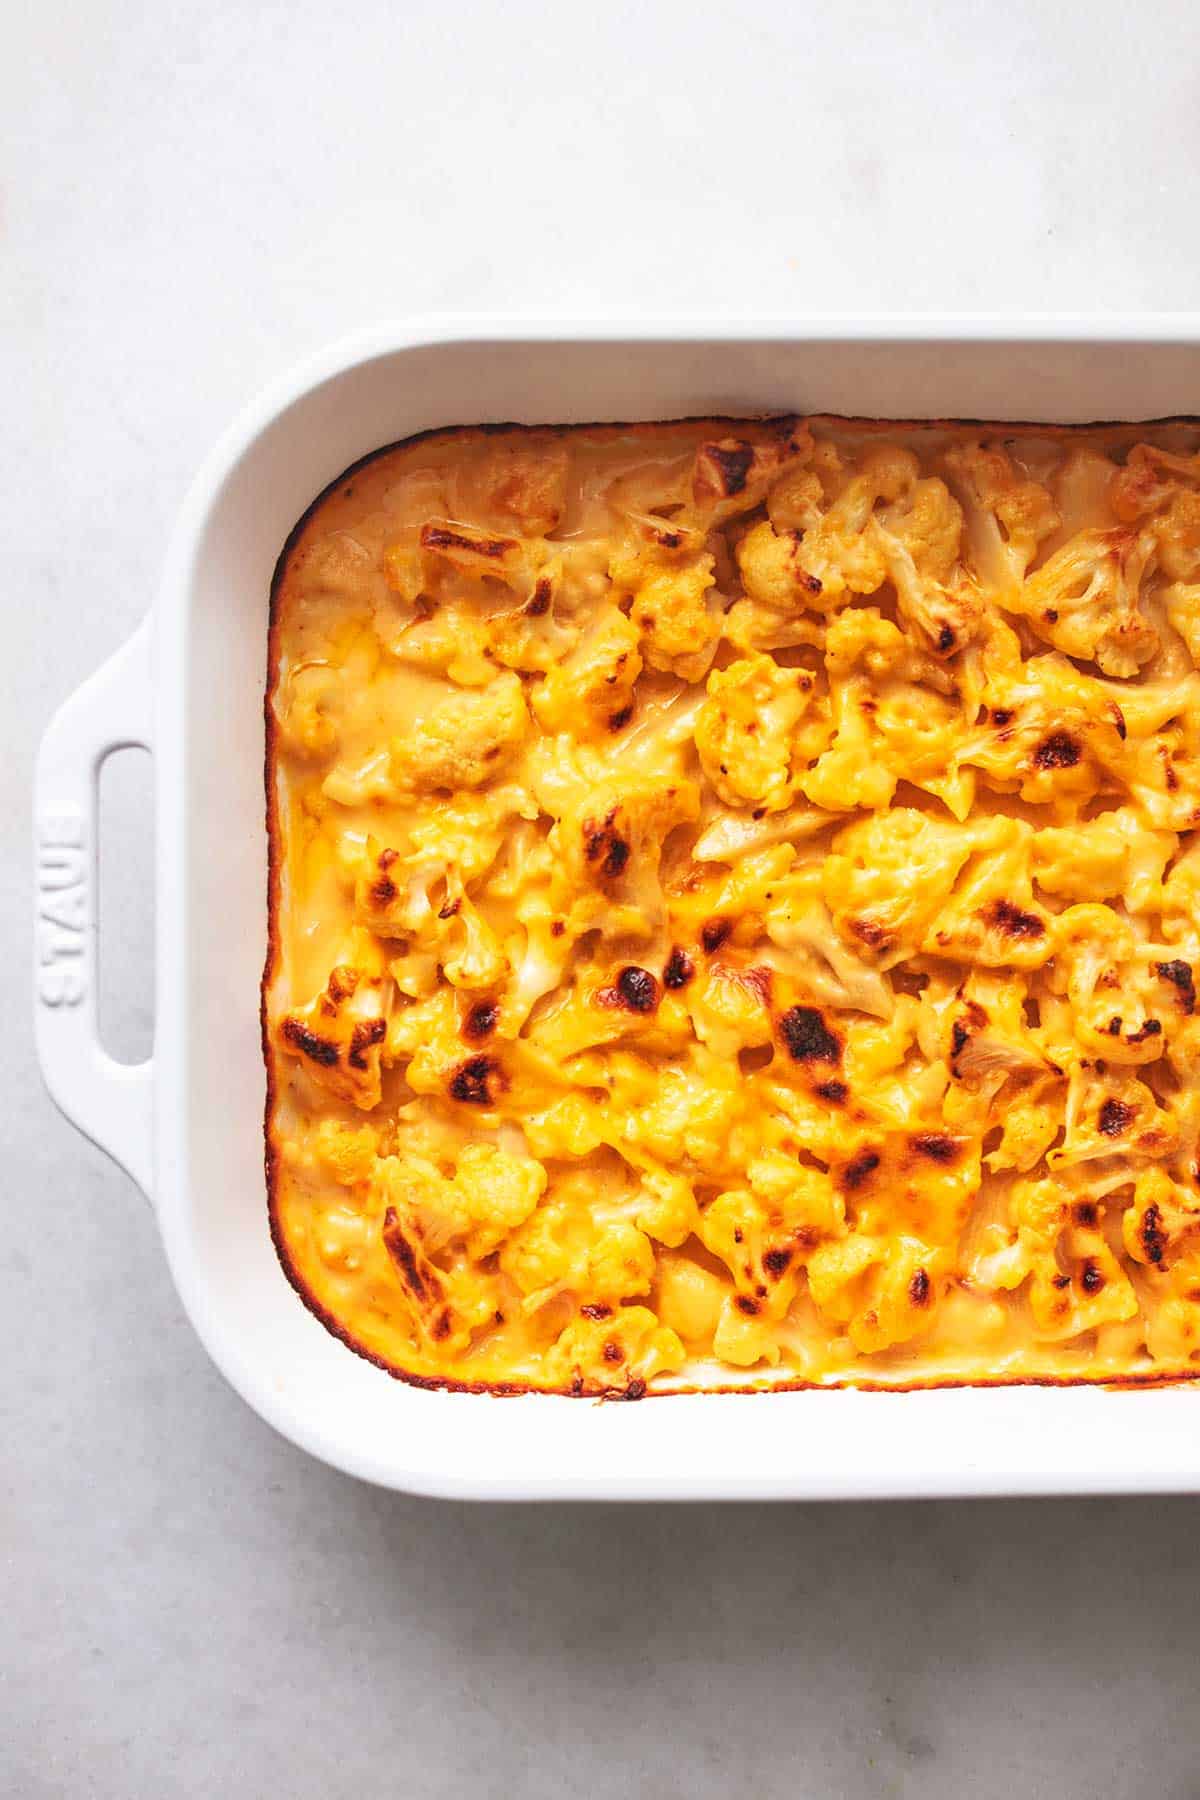
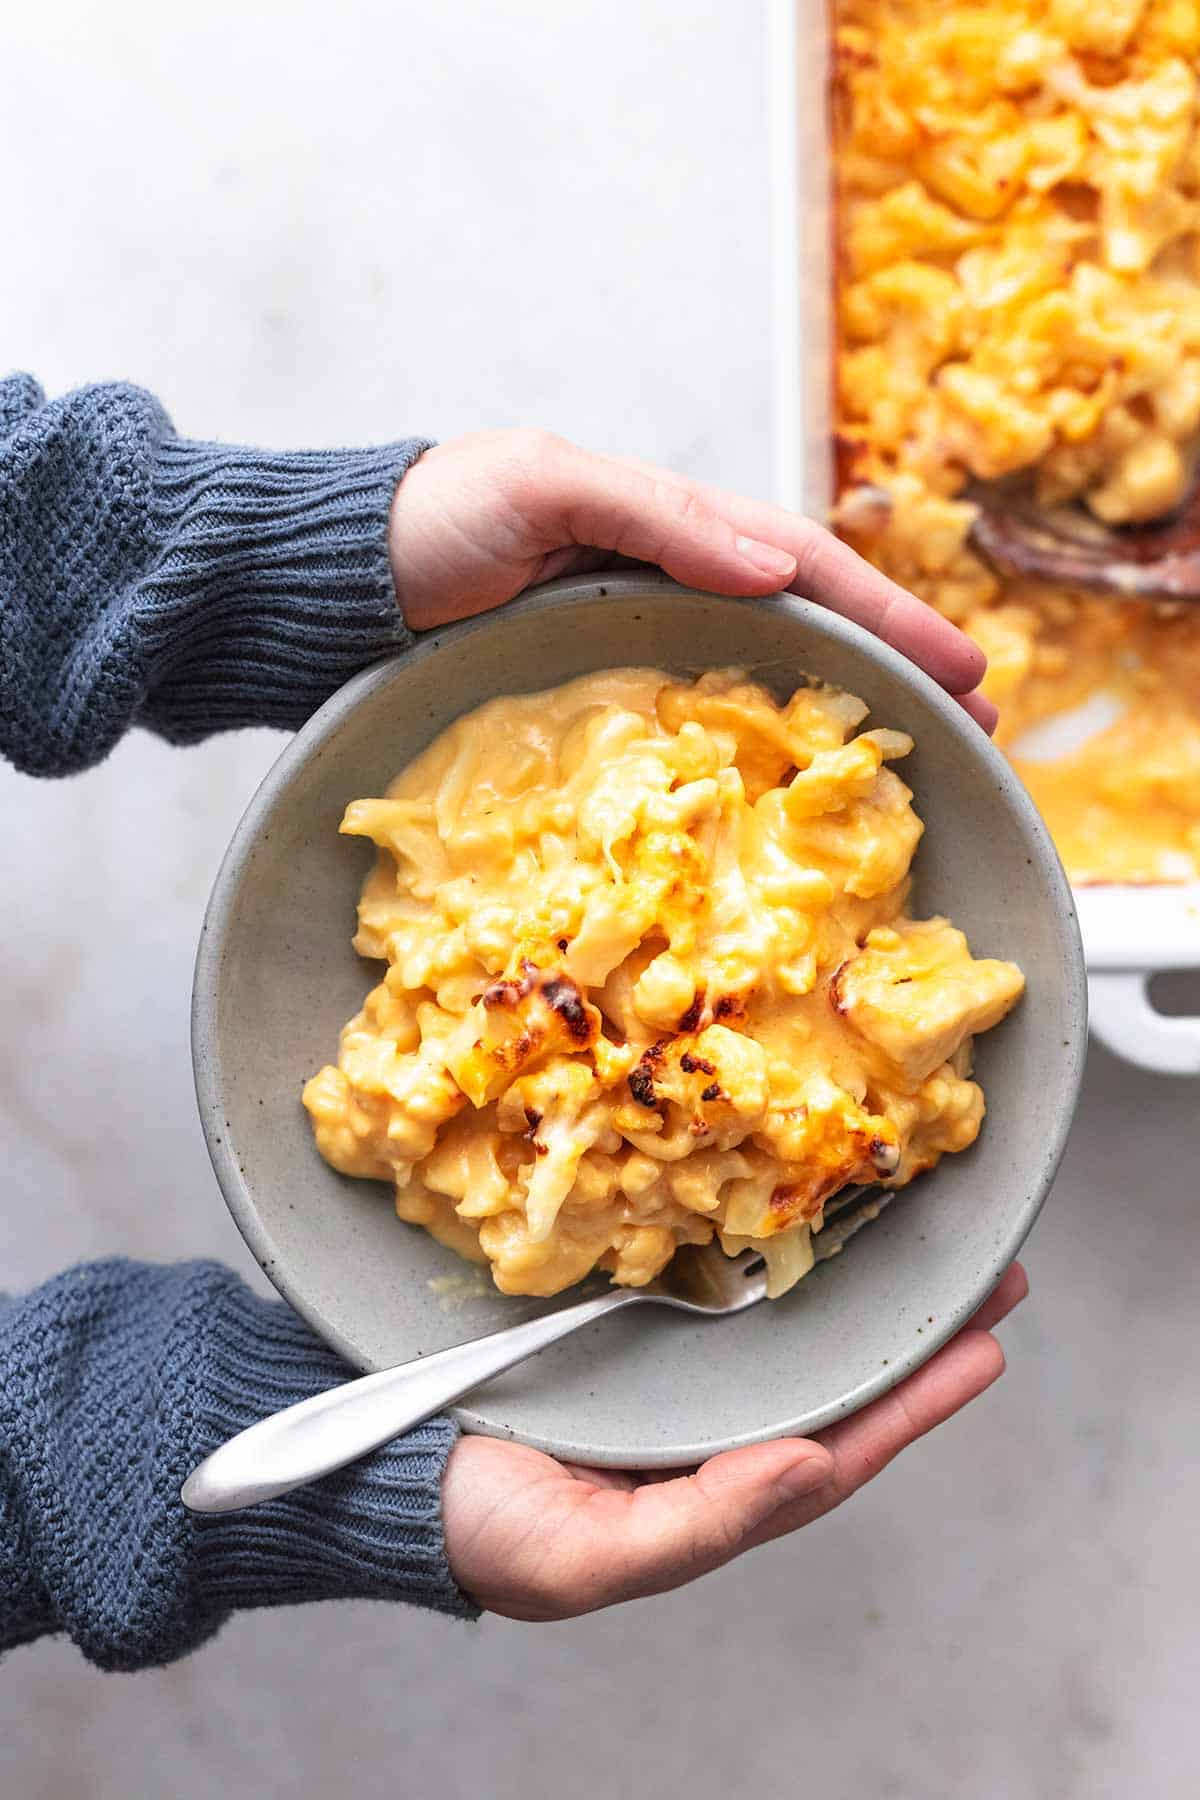
- Put the dish into the oven for 25 minutes until the cheese is bubbly and the outsides begin to brown. Switch the oven to “broil” for 2-4 minutes to really brown that top if you wish. (not pictured)
- Pull the baking dish from the oven and allow to cool a little before serving. (not pictured)
Frequently Asked Questions
While sharp cheddar cheese is my favorite cheese in all mac and cheese varieties, there are quite a number of delicious cheeses that work great too.
– Mild or medium cheddar
– Parmesan (I like to mix parm with another cheese)
– Pepper jack
– Gouda
– Gruyere
– Goat cheese (I mix this one too)
– Brie (this one works great, but it is a super sticky, melty cheese so you don’t have to go too heavy on it).
– Monterey jack
Expert Tips
- Remember to use that hand-shredded cheese in this cauliflower mac and cheese. (Grate on a block or in a food processor with the appropriate attachment if you have it). I love using sharp cheddar but another version of cheddar works great, as well as pepper jack, or mix a couple of your favorite cheeses if you like too, so long as they add up to two cups.
- When choosing a head of cauliflower, make sure it is heavy, thick, and compact. You want the leaves to be green and not yellow or wilting. If some of the florets are browning, you can cut those off if it’s just a spot or two, but avoid any that are very brown or heads that are soft.
- If you want to avoid watery cauliflower mac and cheese, after you drain the cauliflower from steaming in the microwave you can pat it dry with a paper towel. Or, I’ll drain the water off, then dump the cauliflower onto a kitchen towel and let it sit and dry a bit while I’m making the cheese sauce.
More Tasty Cauliflower Recipes
- Easy Buffalo Cauliflower
- Roasted Cauliflower and Broccoli
- Cauliflower Fried Rice
- Sweet and Sour Cauliflower
- Parmesan Roasted Cauliflower
Did you make this baked Cauliflower Mac and Cheese recipe? YAY! Please rate the recipe below!

BEST Baked Cauliflower “Mac” and Cheese
Ingredients
- 6-8 cups cauliflower, chopped into 1-inch pieces (I used 1 1/2 heads of cauliflower)
- 2 tablespoons butter
- 3 tablespoons flour
- 2 cups whole milk
- 1 ½ teaspoons salt
- ¼ teaspoon cracked black pepper
- ½ teaspoon garlic powder
- 2 cups shredded sharp cheddar cheese, 8 ounces, see note
Instructions
- Preheat oven to 375 degrees.
- Fill a microwave-safe bowl with 1 inch of water. Add cauliflower to the bowl and microwave on high for 8 minutes. Drain and set cauliflower aside.
- In a large sauce pan, melt butter over medium heat.
- Stir in flour for about 3 minutes.
- Gradually whisk in the milk, a little at a time, until completely incorporated and mixture is thick and smooth.
- Remove from heat, salt, pepper, stir in garlic powder, and shredded cheese until melted and completely incorporated and smooth.
- Stir in cauliflower. Transfer to a 9×13 inch baking dish.
- BAKE for 25 minutes until cheese is bubbly and begins to brown. Switch to BROIL for 2-4 minutes to brown the top a bit more.
- Dish will be hot! Allow to cool slightly before serving.
Notes
- You can swap out some or all of the cheese for another kind. I have made this with white cheddar cheese and it is delicious. Try half white cheddar, half pepper jack for a bit of a kick!
Nutrition
Nutrition information is automatically calculated, so should only be used as an approximation.


This was really good! I used 2% milk and slowly worked it in to use the correct amount. I used about 1 1/2 cups. I also mixed Sharp and mild Cheddar. Came out great. I will be adding this to the dinner rotation.
Thanks for your great review! Happy to hear that you enjoyed this recipe.
I loved this recipe! So simple! I really enjoy a kick of heat in my recipes so I used about 1 tablespoon of cracked 4 peppercorn mix, 1 teaspoon of red pepper flakes and 1 tablespoon of parmesan for umami!
Can you use 2% instead of whole milk?
Yes, but it will not turn out as creamy.
My sauce too came out pretty runny. I think it could have used more butter for the roux.
Made this tonight and it was really good! Followe instruction letter by letter! I did use Sharp Vermont Cheddar and Pepper Jack cheese! Will def do it again!
So happy to hear that! Thanks for sharing your feedback.
Great recipe! I added 1 tsp of Ground Mustard because that’s what goes in my traditional Mac & Cheese recipe, it was delicious! I’ll be making this again! Thanks!
Loved the recipe. Added a little honey garlic seasoning on my own for extra flavor. A little disappointed that it was a little runny. Maybe too much milk?
So DisappointEd. Very watery! Id probabLy use less milk next time.
Love this recipe, but i dont see the amount of garlic powder in the Ingredients.
I’m so sorry – seems there was a glitch in the recipe card but it should be fixed now – it’s 1/2 teaspoon. 🙂
Fantastic! I used half CHEDDAR And half gruyeR. Also Topped it with buttered breadCrumbs. Delicious…