Baked Sweet & Sour Cauliflower
This post may contain affiliate links. Please read our disclosure policy.
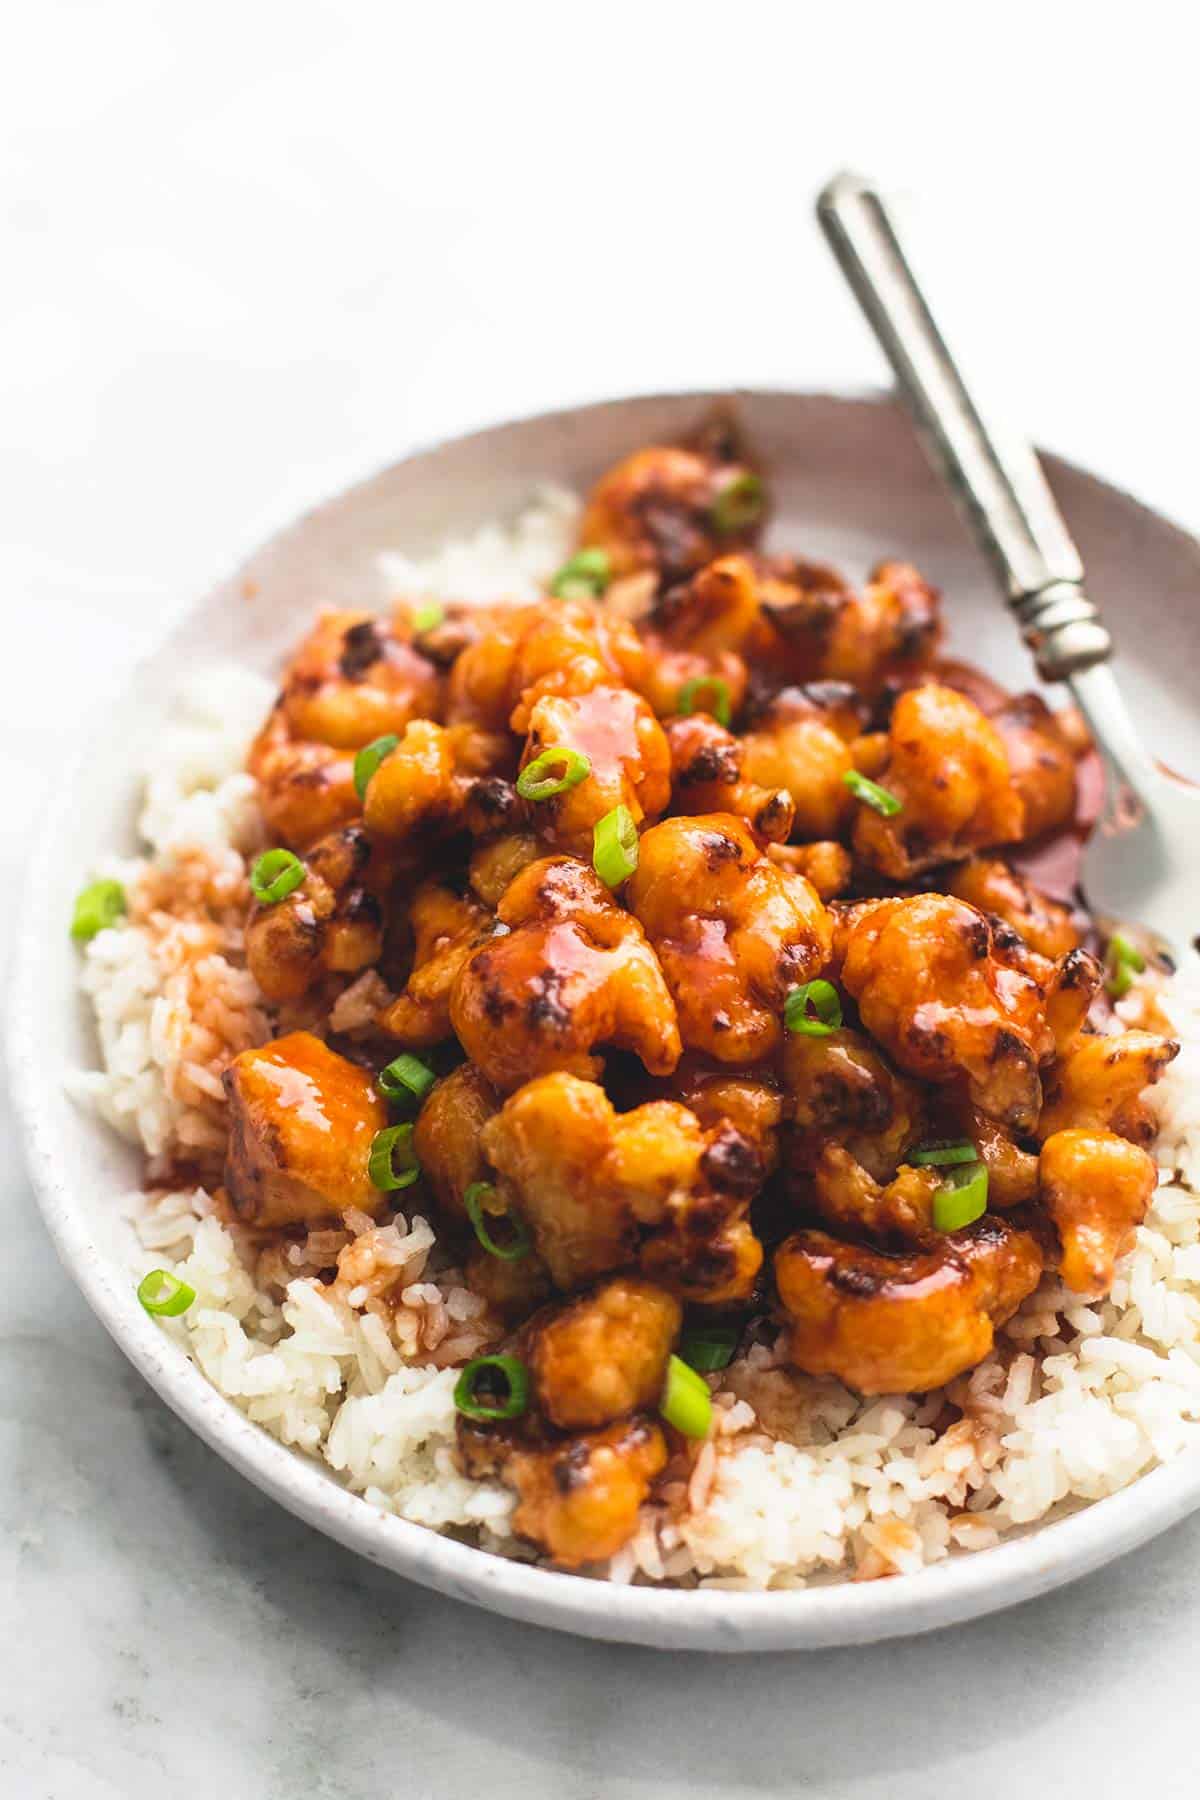
Easy and healthy Baked Sweet & Sour Cauliflower is a delicious twist on classic sweet & sour chicken or pork and it’s baked instead of fried. You won’t miss meat in this lightened up classic!
Add these to your Meatless Monday rotation: Cauliflower Fried Rice, Mediterranean Veggie Pizza, Easy Creamy Macaroni and Cheese, and French Onion Grilled Cheese.
Let’s get the most important thing out on the table here: Anything that is meatless and still pleases my husband is a WINNER WINNER chicken dinner. Minus the chicken part…for obvious reasons…okay just a winner dinner.
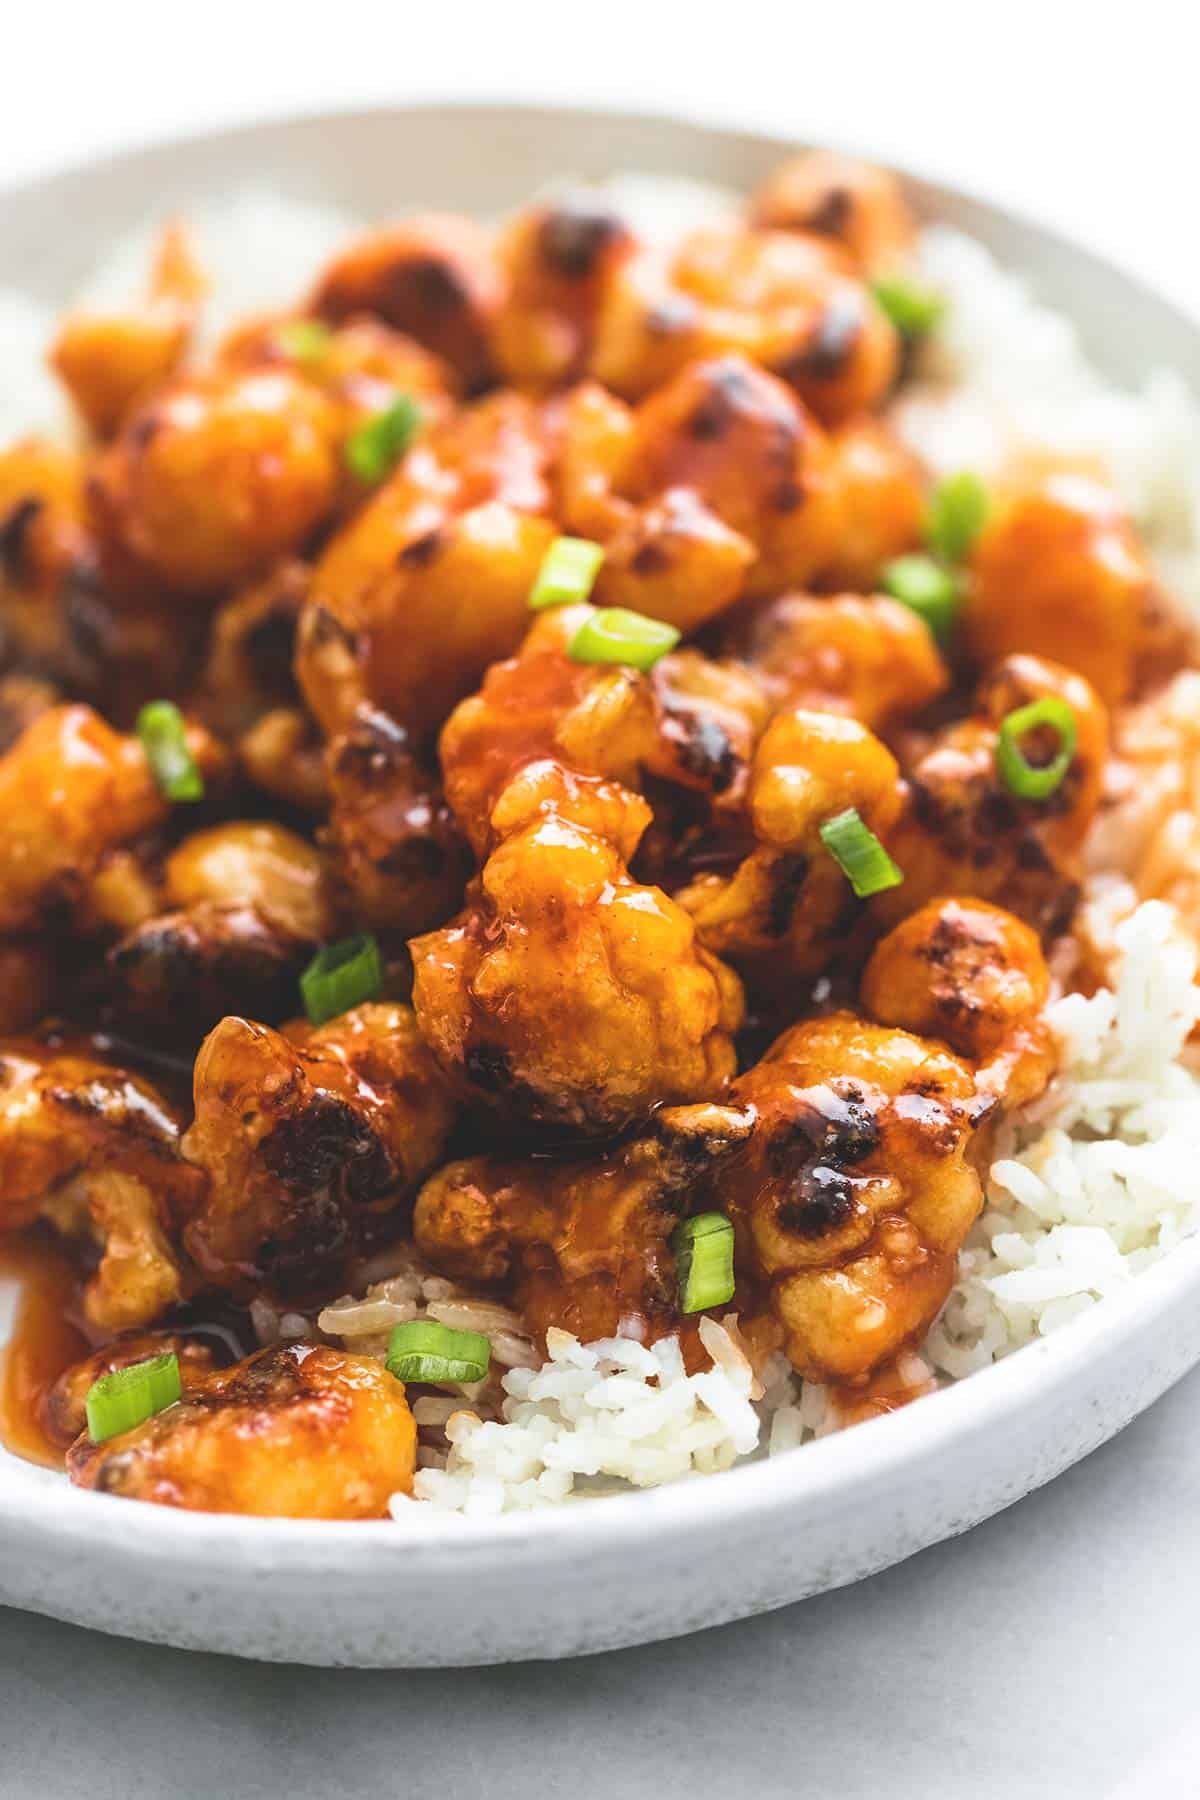
So what is this exactly? It’s cauliflower florets, tossed in a bit of oil and coated in cornstarch and then baked to perfection. Crispy on the outside, tender on the inside. A lot like chicken, only more cauliflower-y. And all of that faux-fried cauliflower goodness is then tossed in the best sweet and sour sauce. You will want to put this sauce on e-ver-y-thing. It’s incredibly easy to make and the flavor is spot-on.
Eating meatless once in a while is healthier for you, is a great way to incorporate more plant proteins into your diet, is more nutritional (and cheaper) than takeout, and it is better for the planet, a big consideration on a lot of people’s minds these days. If you’re looking for more meatless options, then this Asian cauliflower dish is the perfect place to start.
This dish is a great entry into the world of meatless meals if you are simply trying to be okay with the idea of eating cauliflower where chicken and pork usually take the stage. Whatever the reason, I’m positive this baked sweet & sour cauliflower thing will fit in there somewhere.
HOW DO I SERVE SWEET & SOUR CAULIFLOWER?
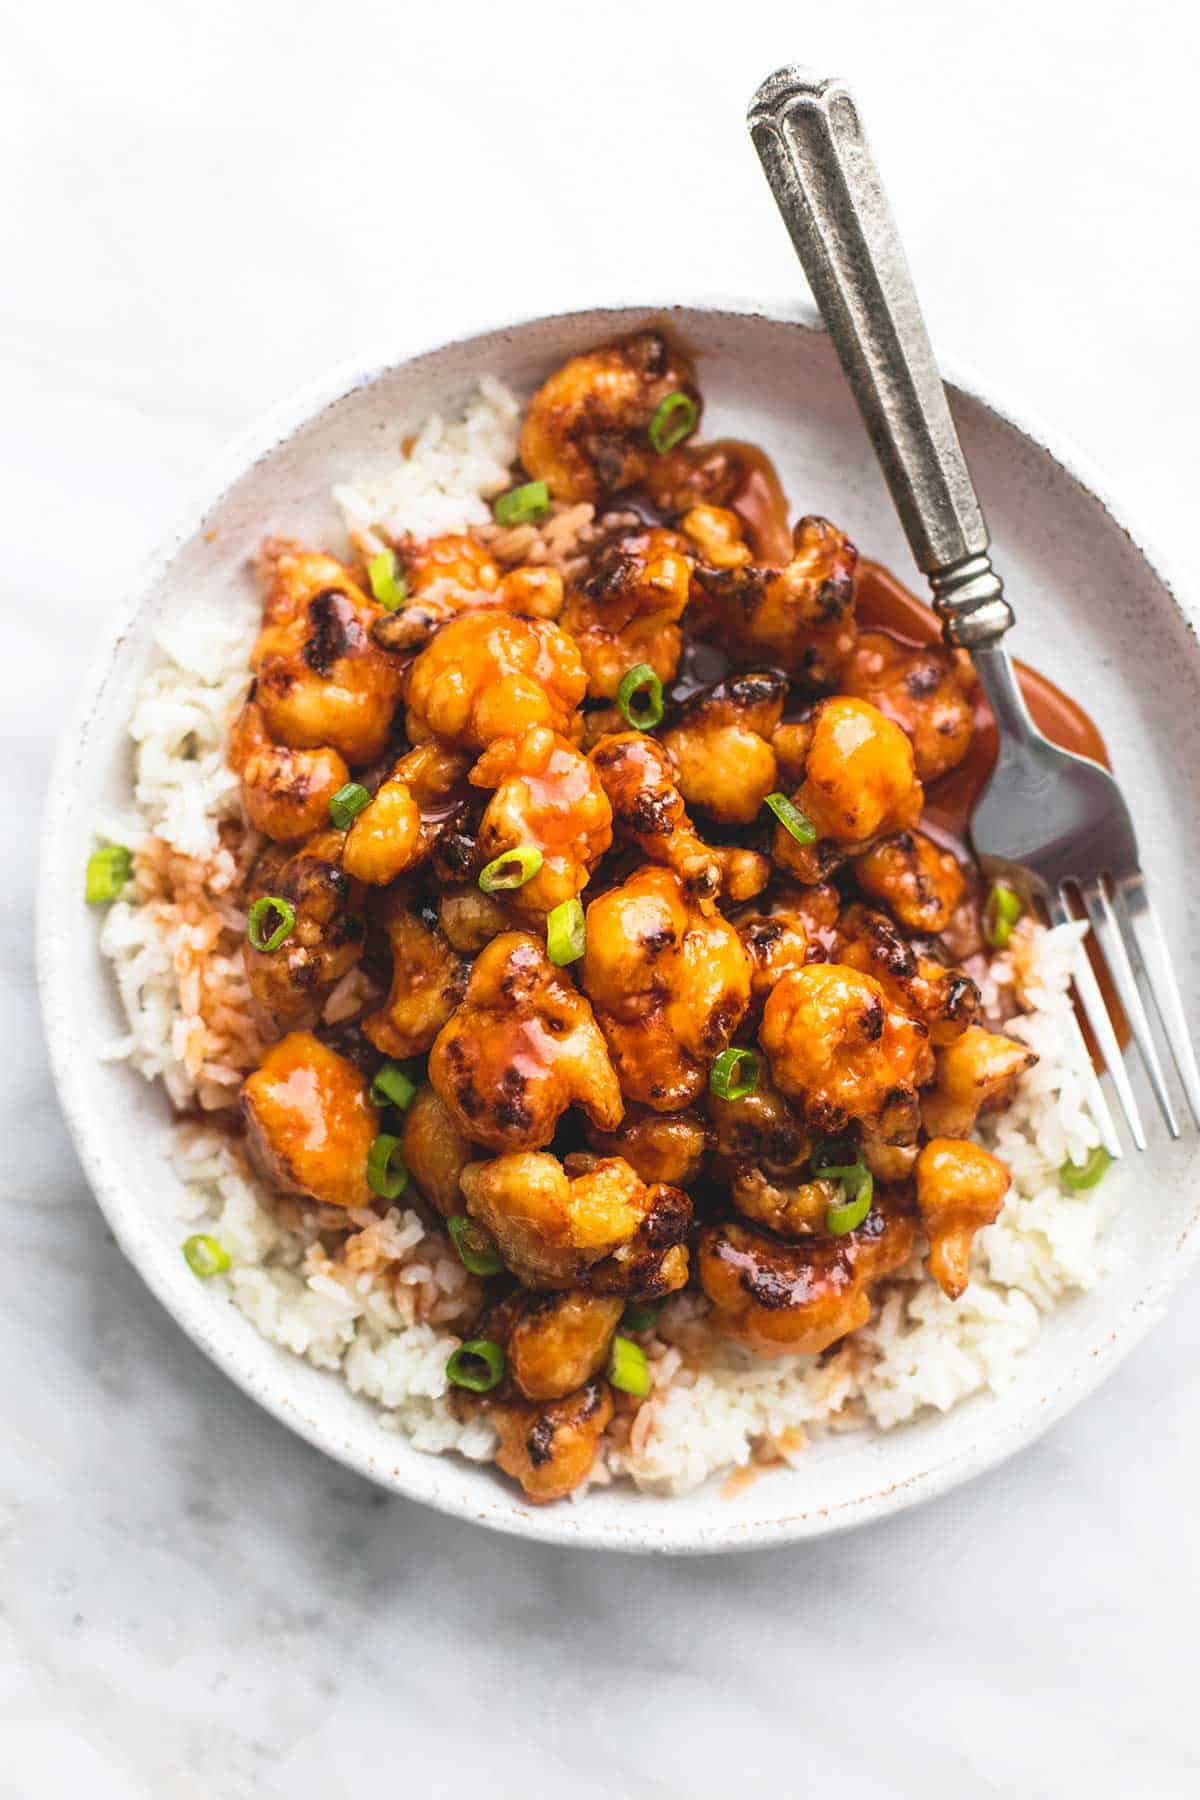
I like to serve this dish over rice. Sweet & Sour over starchy & simple is kinda how we roll at this house. But there are other just as delicious ways to serve up this cauliflower recipe.
- Sure, you could use regular white rice, but what about brown rice or even cauliflower rice? (That one isn’t for those with sensitive stomachs, though!)
- Serve them alone, as an appetizer. Think of them like meatless wings with an Asian sauce.
- Serve this cauliflower over zucchini or yellow squash noodles. You could even try half a cooked spaghetti squash for a purely vegetarian dish.
- Make kebabs by alternating cauliflower with pineapple before or after baking.
- Add sweet & sour cauliflower over quinoa, barley, or wild rice for a truly nutty tasting, filling meal.
HOW DO YOU MAKE BAKED SWEET & SOUR CAULIFLOWER?
Although it might sound complicated, it’s not at all. If you can cut and bake chicken or pork with sauce, then you can do the same to a veggie!
Preheat the oven to 425 degrees, and grease a baking sheet. Combine the cut cauliflower and oil in a large air-tight bag. Make sure it’s sealed and give it a good shake to coat all the cauliflower thoroughly. Open the bag back up and add cornstarch. Seal the bag back up and shake some more to make sure the cornstarch now coats the cauliflower pieces.
Now that the cauliflower is coated in both oil and cornstarch, you can transfer it to the greased pan. Spread it out into one even layer and bake for 15-20 minutes or until it starts to brown on the bottoms. Change the oven over to broil and cook on high another 3-4 minutes under the broiler to get the tops to brown as well. Make sure to keep a close eye on it so it doesn’t burn.
While the cauliflower is cooking, you can make the sauce. Mix together sugar, vinegar, soy sauce, garlic powder, onion salt and ketchup in a medium saucepan at high heat and let it come to a boil while you stir.
In another small bowl, whisk together 1 tablespoon of cornstarch into cold water until it dissolves. Add this mixture to the sauce pan and stir it all together until it thickens some more, then turn the burner down to low heat.
When the cauliflower is done baking, toss it and the sauce together in a heat-safe bowl. Serve!
HOW TO CUT CAULIFLOWER
I cut cauliflower similarly to how I cut broccoli. That is to say, break it down from bigger to smaller pieces.
- First, remove the leaves.
- Turn the head upside down and cut out the stem.
- Either break or cut the bigger pieces of florets off.
- Cut the larger parts of the stems off the bigger florets, if desired.
- Take each larger floret and cut those down into smaller ones, or the desired size for the recipe.
For this recipe, I like to keep the florets around 2 inches long so they bake more evenly and crisp up just the right amount.
IS CAULIFLOWER A SUPERFOOD?
Believe it or not, cauliflower is considered a superfood. Right up there with kale and acai berries, and pomegranate juice, I suppose. It’s chock full of vitamins B and C as well as fiber and antioxidants and it’s low in calories and has zero fat.
So go ahead, see what all the cauliflower buzz is about!
What people are saying about this Baked Sweet & Sour Cauliflower
“This dish was so easy to make and so delicious!! It was even good left over, cold. Have already made this twice and it will be a weekly meal in our house!! Goes great with carrots!” – Melissa
“This was a great dinner tonight, served over jasmine rice, with veggie spring rolls and broccoli. I think I would use a little less sugar next time, just for personal preference, and maybe add a few red chili flakes. Thanks for a great recipe!” – Vivian
“This is amazing!! I happened to have rice vinegar on hand so I used that instead of apple cider vinegar. the cauliflowers tho, from now on i shall be coating all things in oil and corn starch and throwing them in the oven instead of frying.” – Mandy
“I’m very pleasantly surprised by this sauce! I was pretty suspicious of it (“ketchup, really? Where are the pineapples, the peppers?”), but it turned out great, almost just like the red sweet-and-sour sauce at my favorite Chinese restaurants. I’ll definitely be using that recipe again.” – Steph

Baked Sweet & Sour Cauliflower
Ingredients
- 5-6 cups cauliflower florets
- 3 tablespoons vegetable oil
- ⅓ cup corn starch
- 3-4 cups steamed rice, for serving
- thinly sliced green onions for garnish
Sauce
- ¾ cup sugar
- ½ cup apple cider vinegar , (may sub white vinegar)
- 2 tablespoons soy sauce
- 1 teaspoon garlic powder
- ½ teaspoon onion salt
- ¼ cup ketchup
- 1 tablespoon cornstarch + 2 tablespoon cold water
Instructions
- Preheat oven to 425 degrees and grease a baking sheet. Combine cauliflower and oil in a large ziplock bag. Seal and shake to coat cauliflower in the oil. Open the bag, add corn starch, seal bag and toss to coat again.
- Transfer coated cauliflower to greased pan. Bake for 15-20 minutes until cauliflower starts to brown on the bottoms. Switch oven to broil and cook on high for 3-4 minutes just until tops start to brown. (watch carefully so the cauliflower doesn’t burn!)
- While cauliflower is cooking, prepare the sauce: Add sugar, vinegar, soy sauce, garlic powder, onion salt, and ketchup to a medium sauce pan. Stir and bring to a boil. In a small bowl whisk together the 1 tablespoon corn starch and cold water until dissolved. Add to sauce pan and stir until thickened, then reduce to low heat.
- In a large heat-safe bowl combine roasted cauliflower and sauce. Serve with steamed rice and top with sliced green onions.
Notes
Nutrition
Nutrition information is automatically calculated, so should only be used as an approximation.


I made this tonight and was so surprised by how awesome it tasted. I am curious as to why dip in cornstarch. it seems to me it would be great just roasted and less calories. Has anybody made this without dipping cauliflower.
I wish that I had left out the cornstarch as well. I made less cauliflower than called for and didn’t think to cut the cornstarch in half! Ended up too starchy and gooey (my own fault) but next time I’m trying without for sure!
I just made this. Couldn’t figure out how to coat the cauliflower properly, so it was all clumpy. Made the sauce exactly as described, after sitting a little bit it broke down and it was like the cauliflower was floating in a thin liquid.
The sauce looked and smelled amazing beforehand, not sure where it went wrong. My cauliflower ended up looking nothing like the picture. Will try again soon to see if I can match it. So far, not looking promising.
P.S. Need to include ziplock baggies in the ingredients, I don’t own these things. I had to fold the ingredients in a bowl instead.
I recommend much less vinegar and sugar and more ketchup. This was way too sour for my taste.
Has anyone added tofu to this for extra protein?
I haven’t yet, but that sounds like a great idea! I will do that tonight.
The sauce would probably work really well over baked tofu too.
But I just served the cauliflower with quinoa in place of rice for the sake of protein.
I made it with tofu. I baked it separate from the cauliflower in case the bake time was different but they finished at the same time. Tastes great!
This was a great dinner tonight, served over jasmine rice, with veggie spring rolls and broccoli. I think I would use a little less sugar next time, just for personal preference, and maybe add a few red chili flakes. Thanks for a great recipe!
This dish was so easy to make and so delicious!! It was even good left over, cold. Have already made this twice and it will be a weekly meal in our house!! Goes great with carrots!
Just tried the BAKED SWEET & SOUR CAULIFLOWER. This was easy and delicious with one exception. It may just be
my personal taste but the vinegar is a little strong. I think next time I will use a little less vinegar and maybe replace it with a little more ketchup. I am also diabetic so I used Splenda instead of sugar and it did not effect the taste.
Thanks Jimmy I was wondering abount the splenda and how it would work with that substitution. Trying to cut back on the sugar.
Made this gluten free, and it was fantastic! It tasted like actual Chinese food! It even tasted good the next day, warmed up and cold! Will be making this again for sure!
This tasted GREAT when I first made it but I made it to prep lunches for the next two days and the day after I made it my lunch tasted chalky and like melted corn starch. 🙁 It was so tasty the night before! I couldn’t believe it.
Has this happened to anyone else? Does anyone have any recommendations for using this as a meal prep recipe?
that’s way too much cornstarch. I’d add only 1 teaspoon. It’s just the thickening agent. try coconut flour or POTATO flakes.
Making this tonight, can’t wait! What is the *beside the onion salt for? I’m assuming its optional, or can use onion powder instead? Just wondering, couldn’t find it in the recipe anywhere. Also, what would be good to serve with this in the way of some sort of side and a bread??
I was trying to find the * reference in the recipe also, and because I didn’t have onion salt on hand I looked up how to make your own and found this link https://www.leaf.tv/articles/how-to-substitute-onion-powder-for-onion-salt/