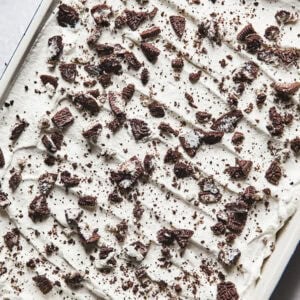
No Bake Oreo Ice Cream Dessert
This post may contain affiliate links. Please read our disclosure policy.
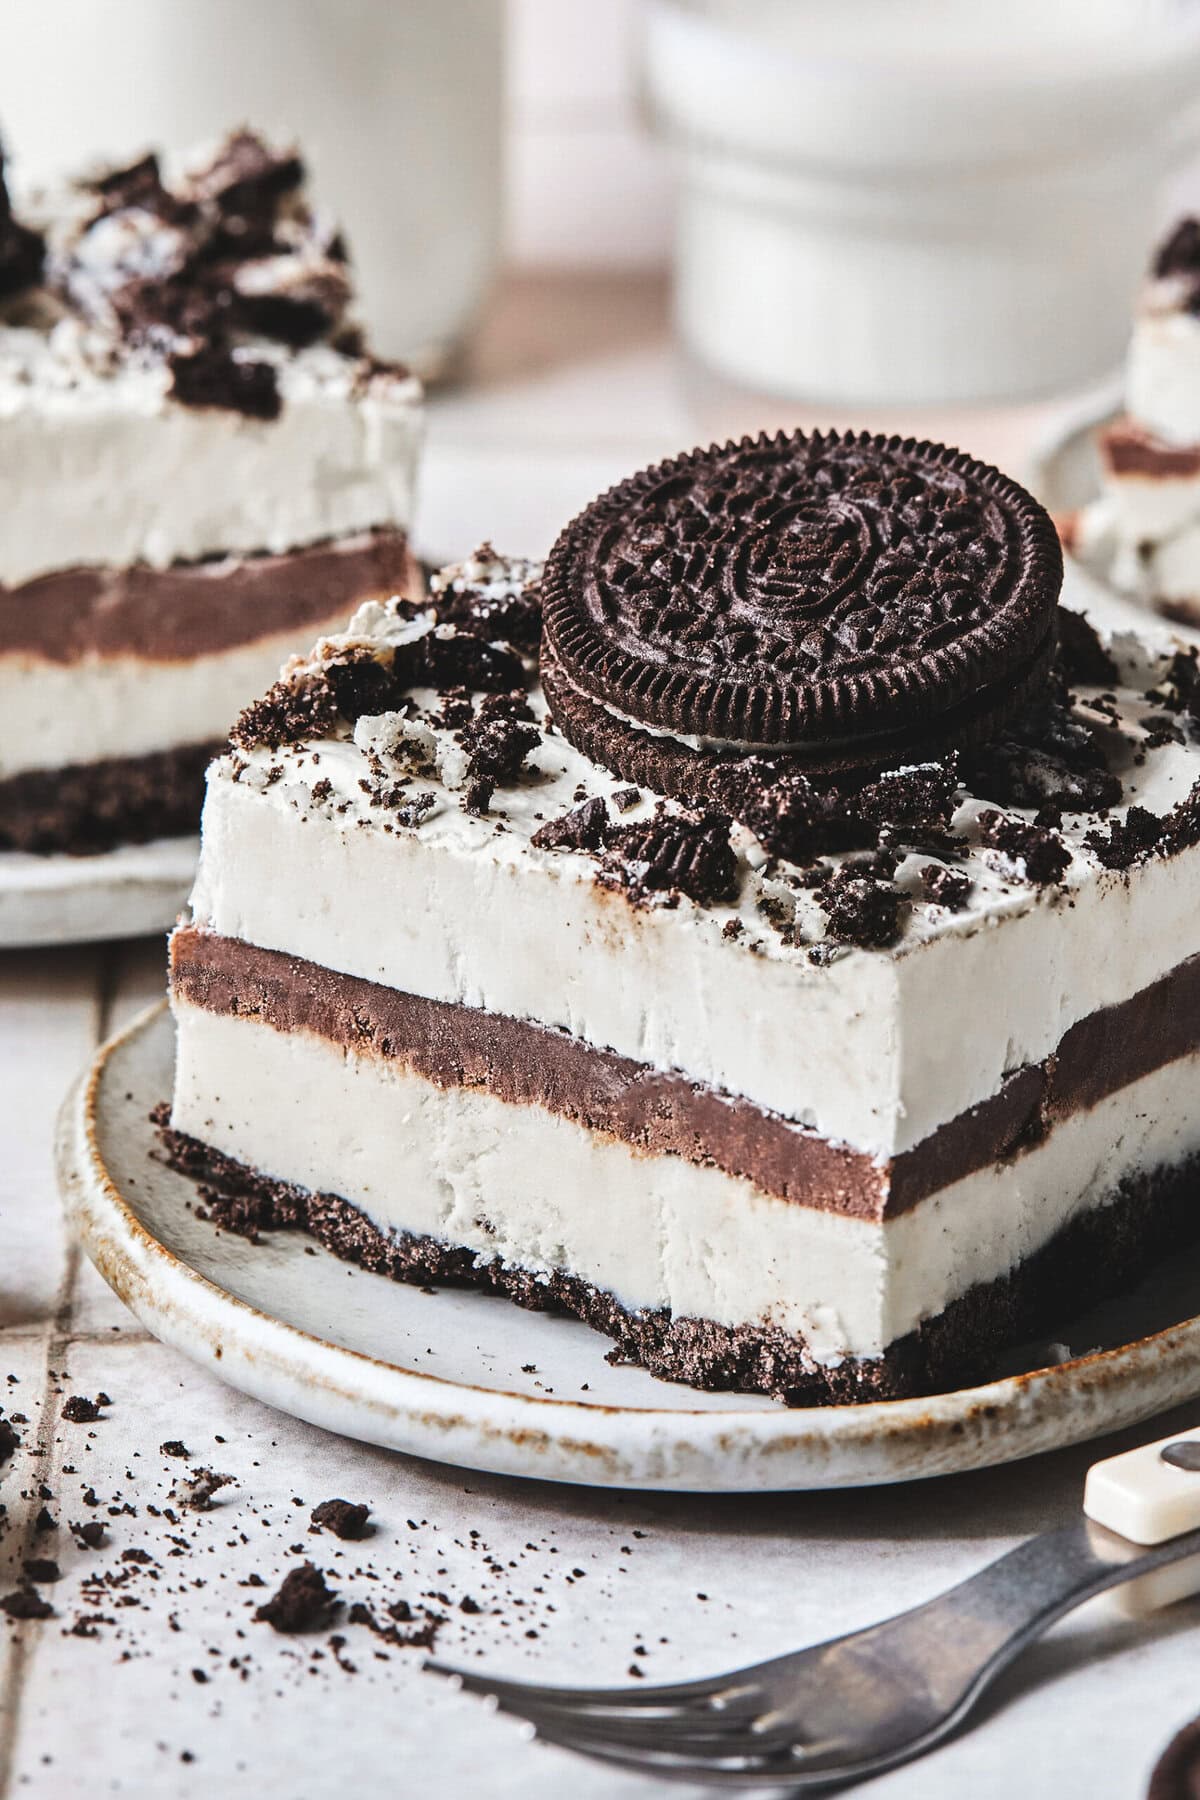
If you’re the kind of person who believes Oreos make everything better, this No Bake Oreo Ice Cream Dessert is for you! With layers of cookies, ice cream, chocolate pudding, and whipped cream, it’s basically a giant Oreo sundae that you can slice and share.
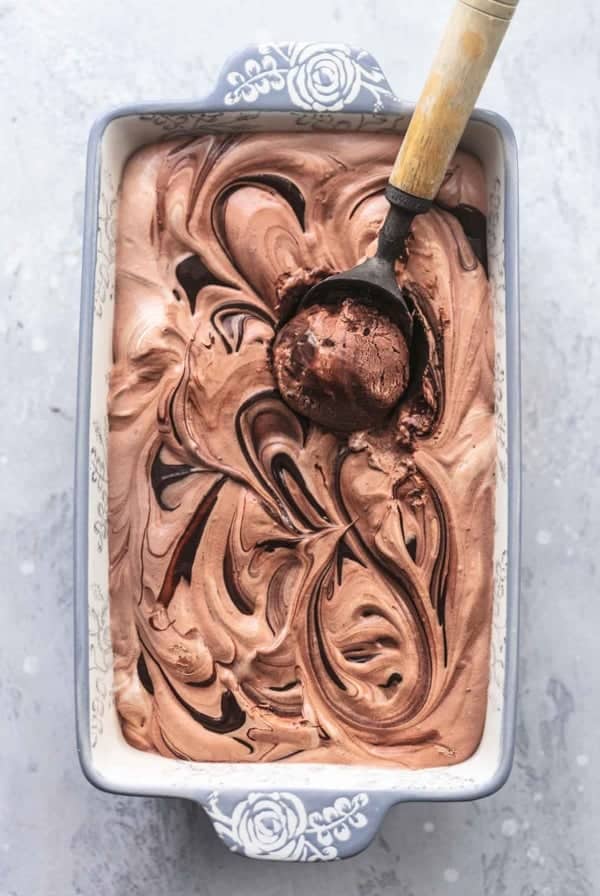
Why stop here when you can have even more delicious ice cream like my Fudge Ripple Chocolate Ice Cream (no churn), Chocolate Chip Cookie Dough Hot Fudge Sundae, and Chocolate Cookie Dough Ice Cream?
")
Why This Recipe Works
It’s no-bake and stress-free. When the weather’s hot, the last thing I want to do is turn on the oven. This dessert layers together in minutes and the freezer does all the work. It’s the perfect make-ahead sweet that you can pull out whenever the craving hits.
The layers are irresistible. This Oreo ice cream cake recipe has layers of goodness. The buttery Oreo crust adds crunch, the ice cream keeps it cool and creamy, and the homemade chocolate pudding brings a rich, fudgy bite. Then, it’s topped with lightly sweetened whipped cream and a sprinkle of crushed Oreos. It doesn’t get much better than that!
Perfect for any occasion. I don’t know about you, but I love a versatile (and easy!) dessert. This one works just as well for a casual family night as it does for birthdays or summer cookouts. You can even swap the vanilla ice cream for your favorite flavor to mix things up!
Ingredients
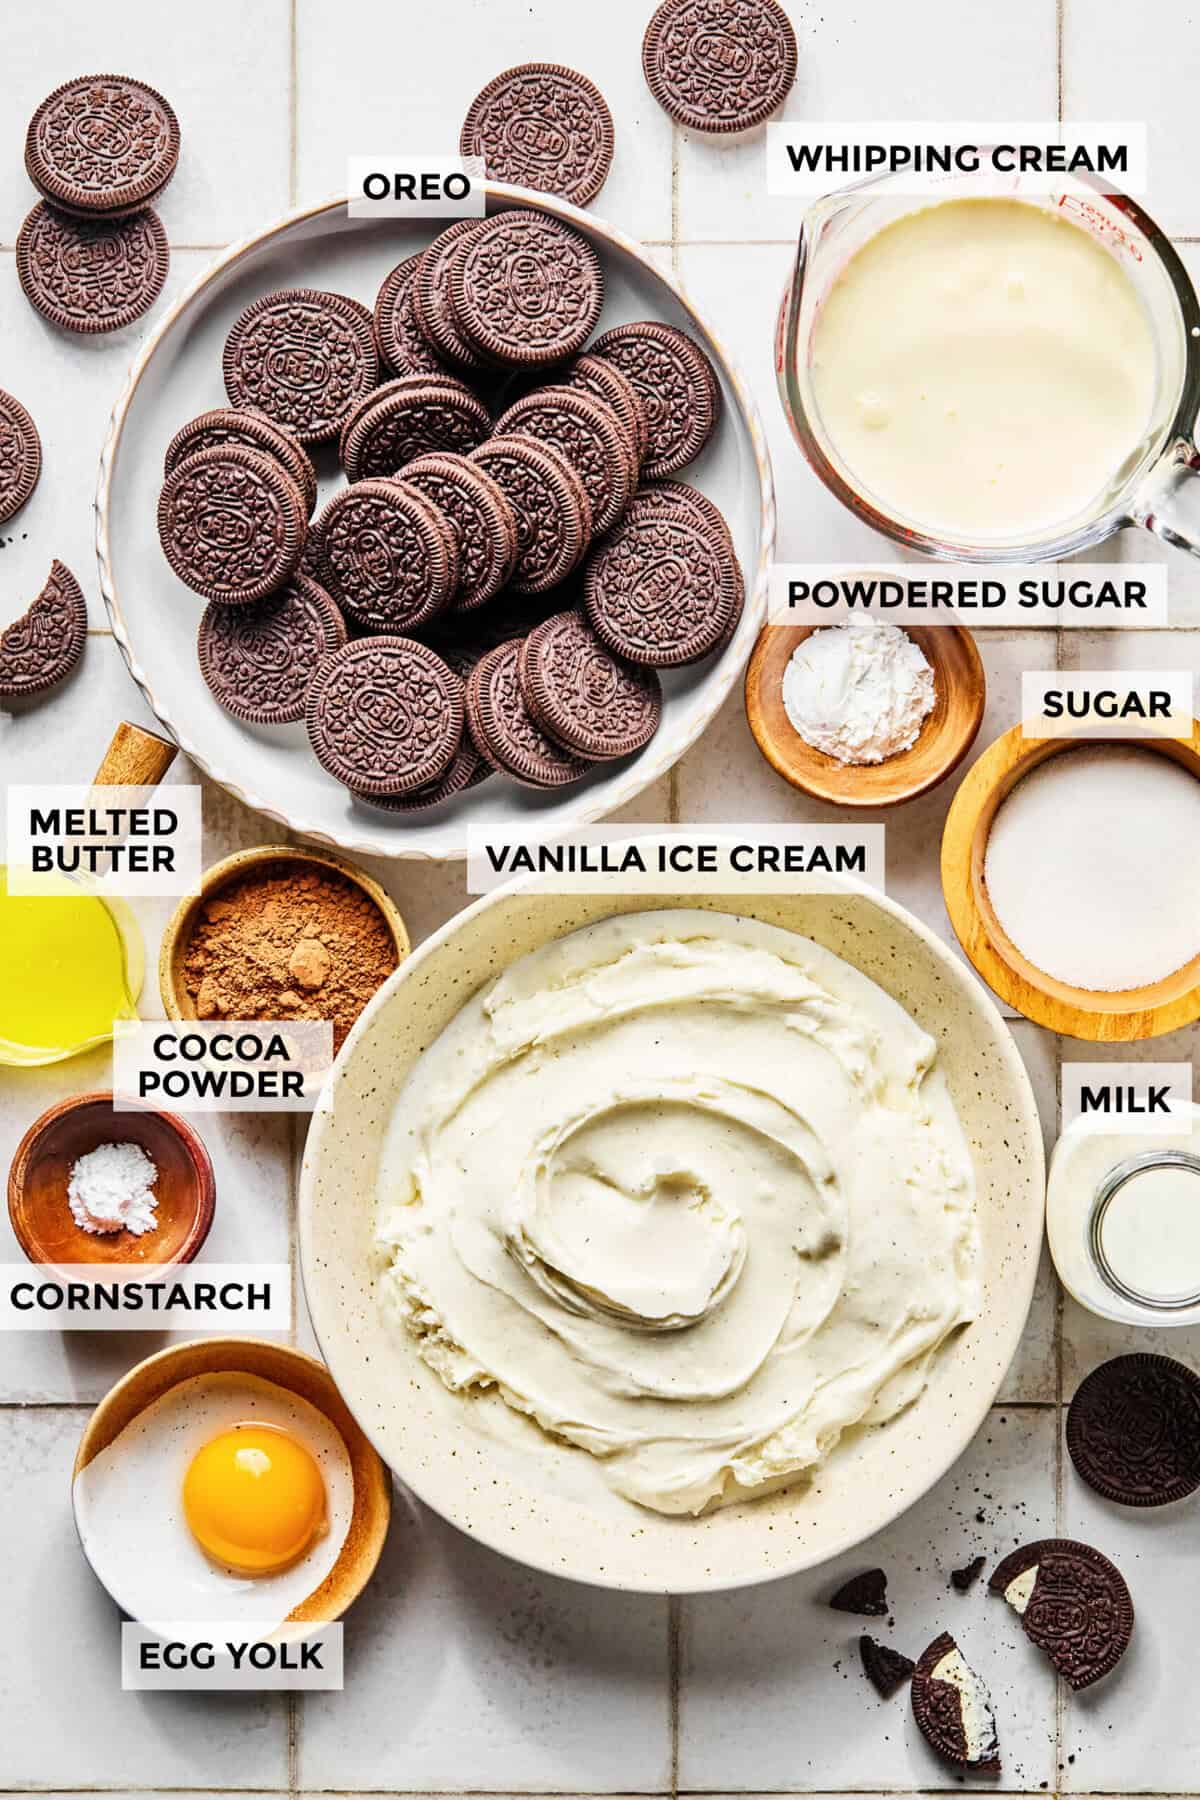
For the crust:
- Oreo cookies: Crushed into fine crumbs for a firm, chocolatey base. It is easiest to do this in a food processor!
- Melted butter: Binds the crumbs together into a sturdy crust.
For the ice cream layer:
- Vanilla ice cream: Slightly softened so it spreads easily. You can use other flavors, too.
For the chocolate pudding layer:
- Egg yolk + cornstarch: Helps the pudding thicken into a silky texture.
- Milk: The creamy base for the pudding! I recommend using whole milk.
- Sugar: Adds sweetness and balances the cocoa.
- Cocoa powder: For that deep chocolate flavor.
For the whipped cream layer:
- Whipping cream: Lightly whipped for a fluffy topping.
- Powdered sugar: Just enough to sweeten the whipped cream!
- Oreos: For the cookie crumbs on top, if desired.
Here’s How to Make It
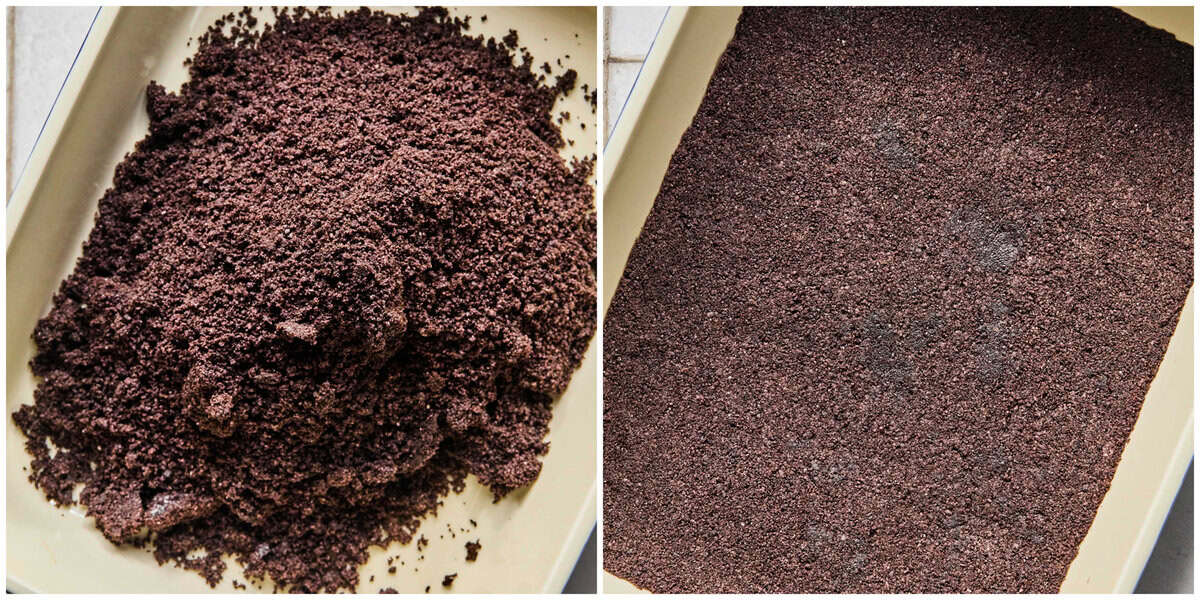
- Make the Oreo Crust: To make the crust, blitz the Oreos in a food processor until you have a light sand. Add the butter and blitz until like rubble. Press into the bottom of a roughly 10” x 6” dish and use the bottom of a measuring cup to make sure it is smooth and well compacted.
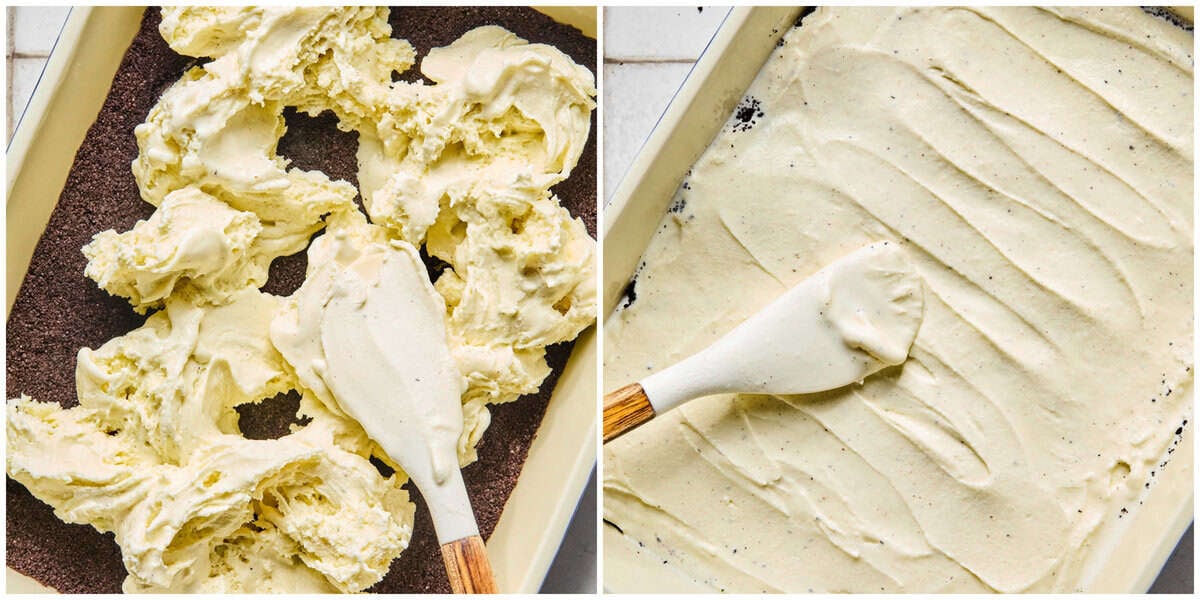
- Layer in the Ice Cream: Spoon over the semi-melted ice cream and use a spatula to smooth it into a single layer. Place in the freezer for 1 hour to firm up again.
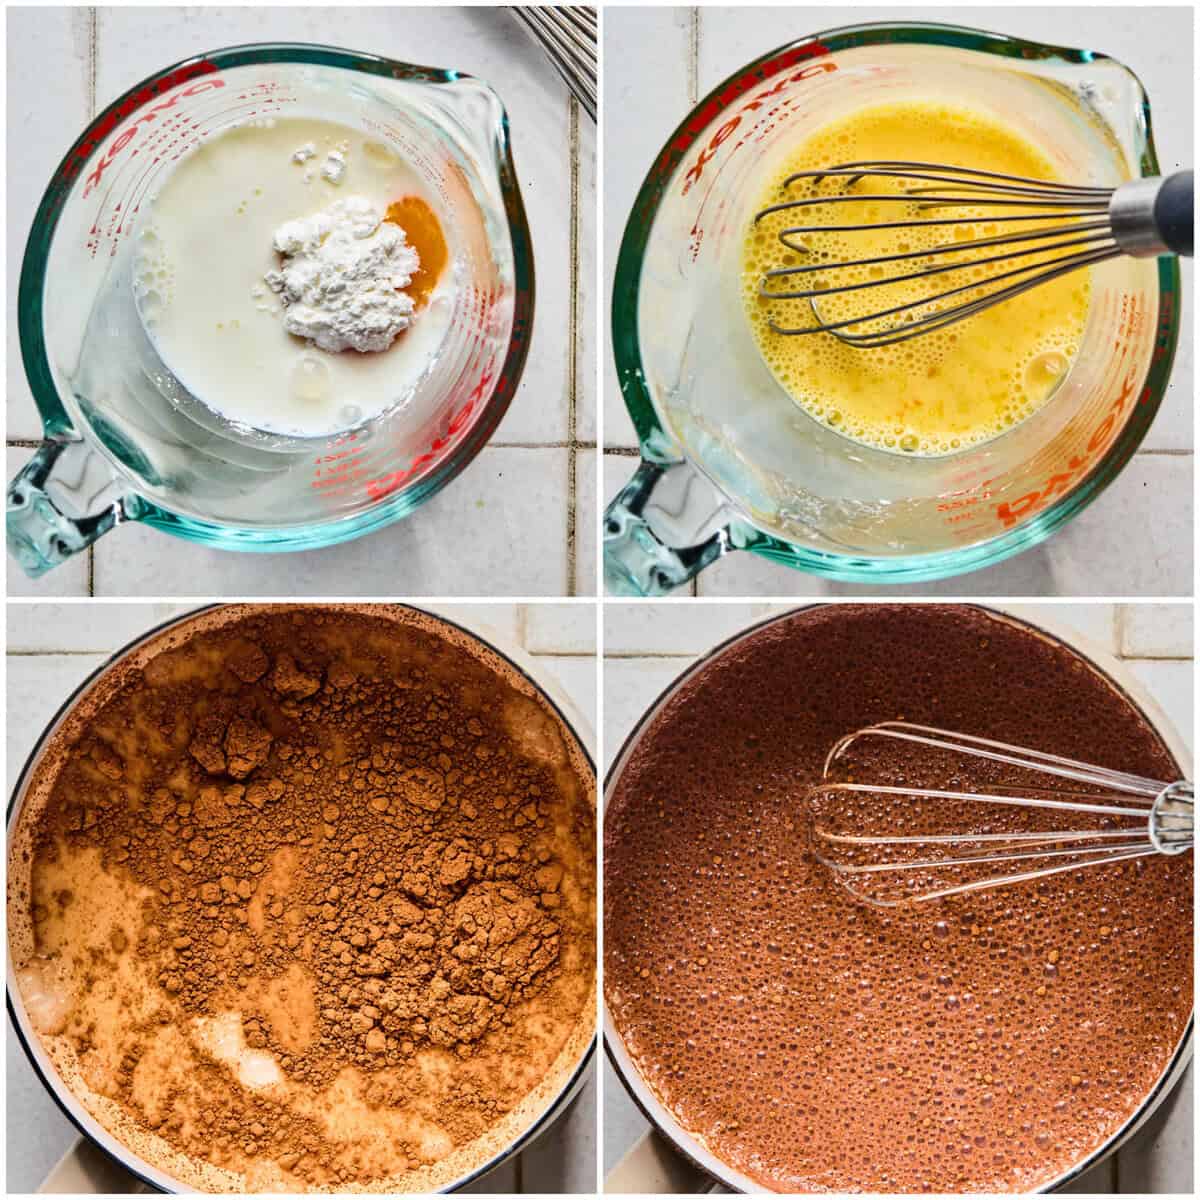
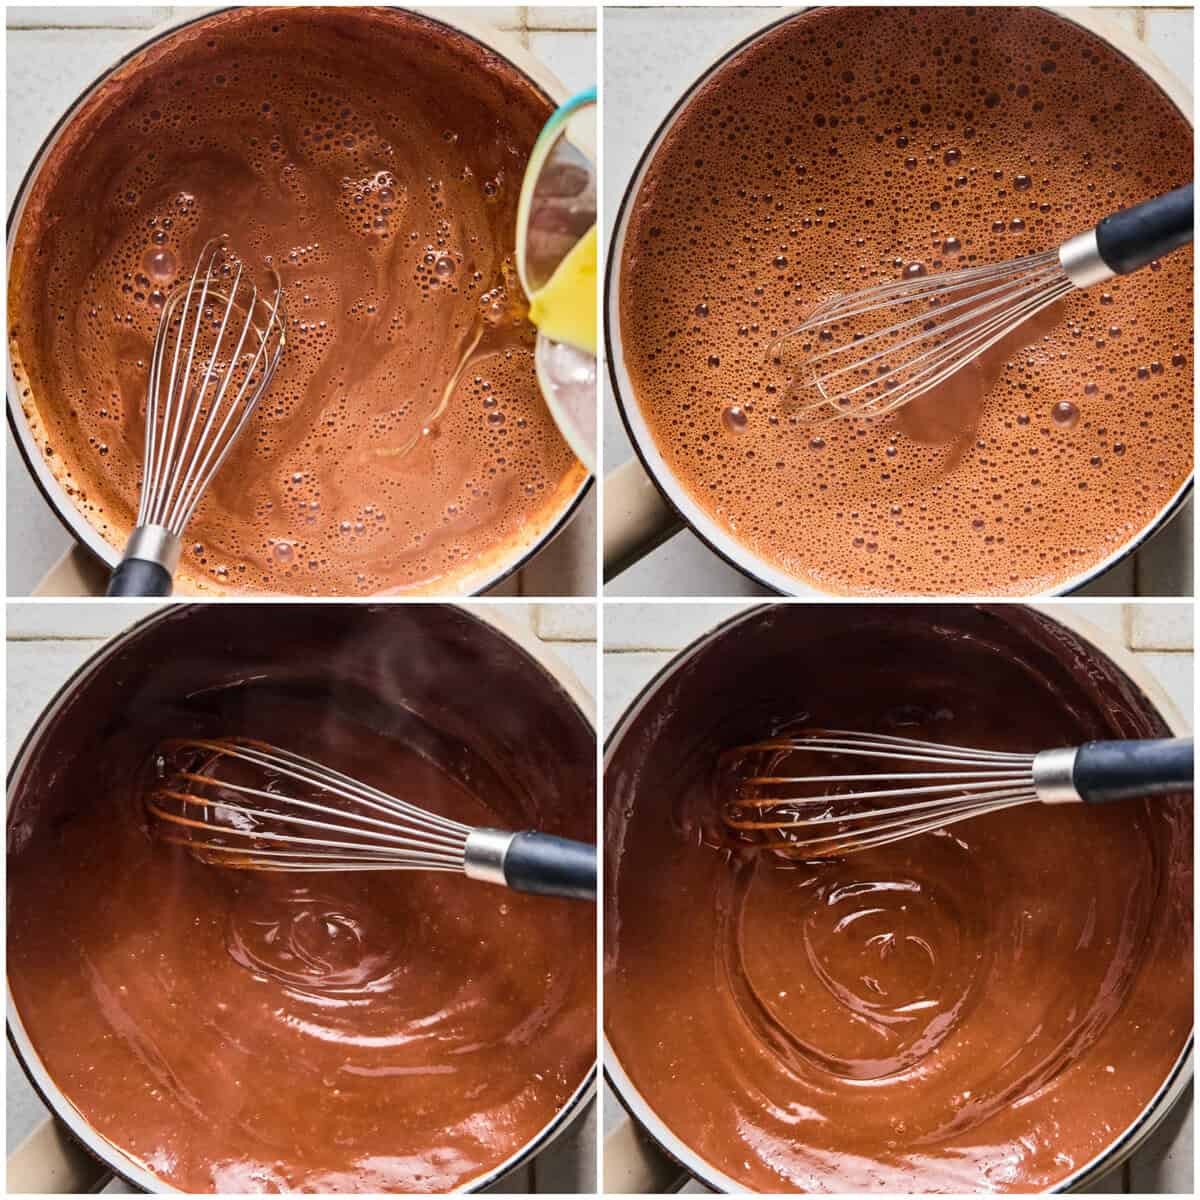
- Make the Pudding: To make the chocolate pudding, whisk together the egg yolk and cornflour, adding splashes of 1/4 cup milk to keep the mixture smooth. Stir together the sugar, cocoa and remaining 3/4 cups of milk in a small saucepan. Heat until just boiling, then remove from the stove. Whisking constantly, trickle in the egg yolk mixture, then return the pudding to a medium heat. Simmer, whisking often, until the mixture has figured to a thick but still pourable pudding. Leave it to cool for 10 minutes, whisking often to help cool it down and to prevent a skin from forming.
- Layer in the Pudding: Pour the slightly cooled pudding over the ice cream layer, smooth the top, then freeze for a further 1 hour 30 minutes.
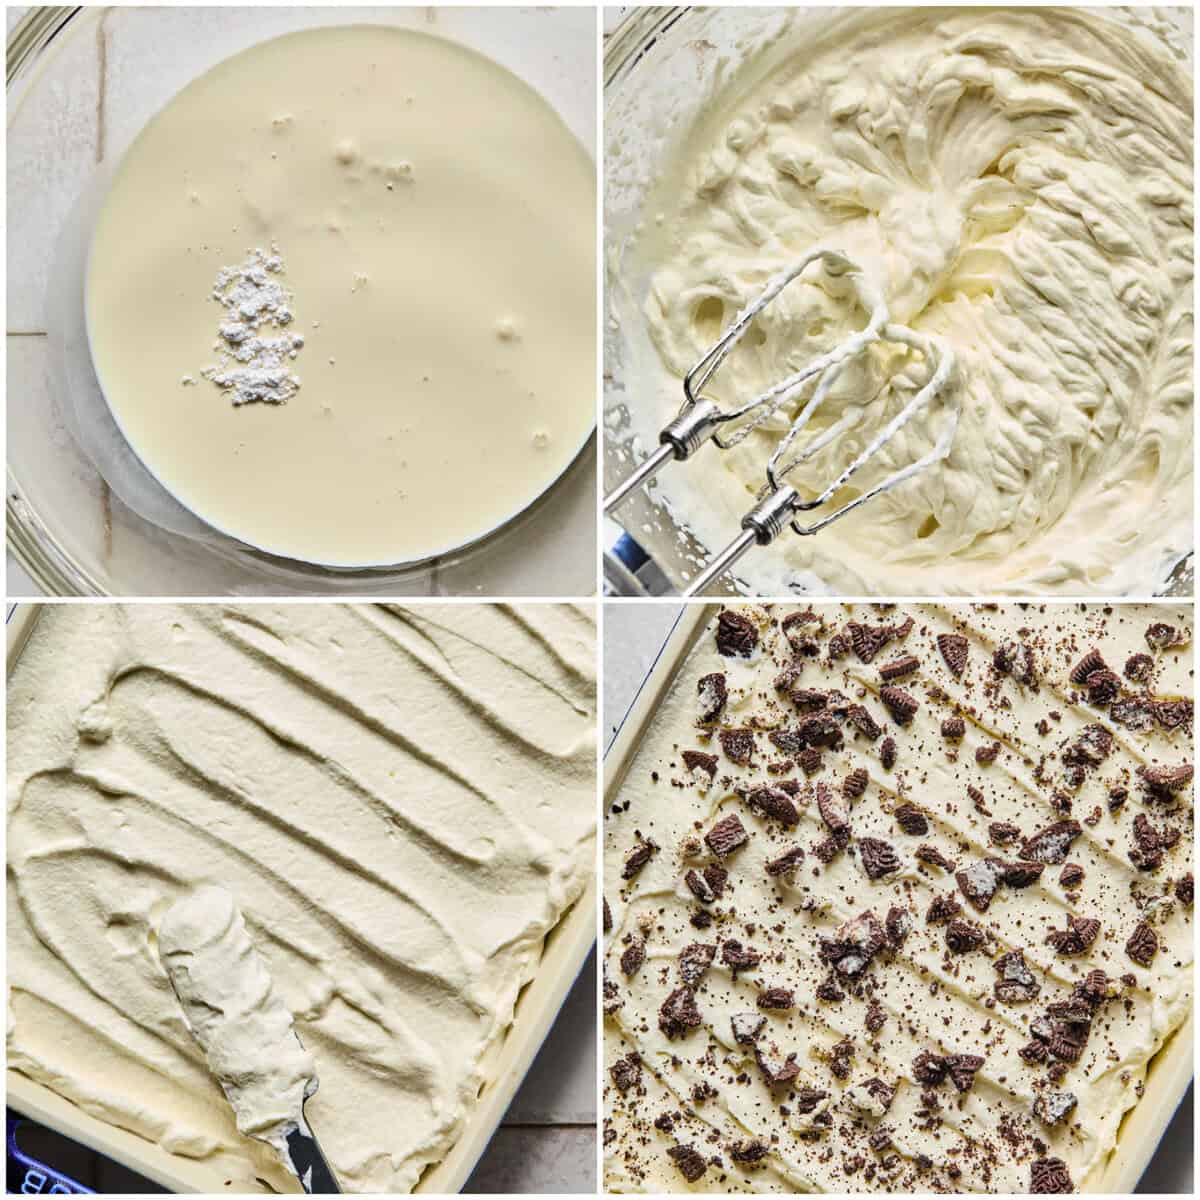
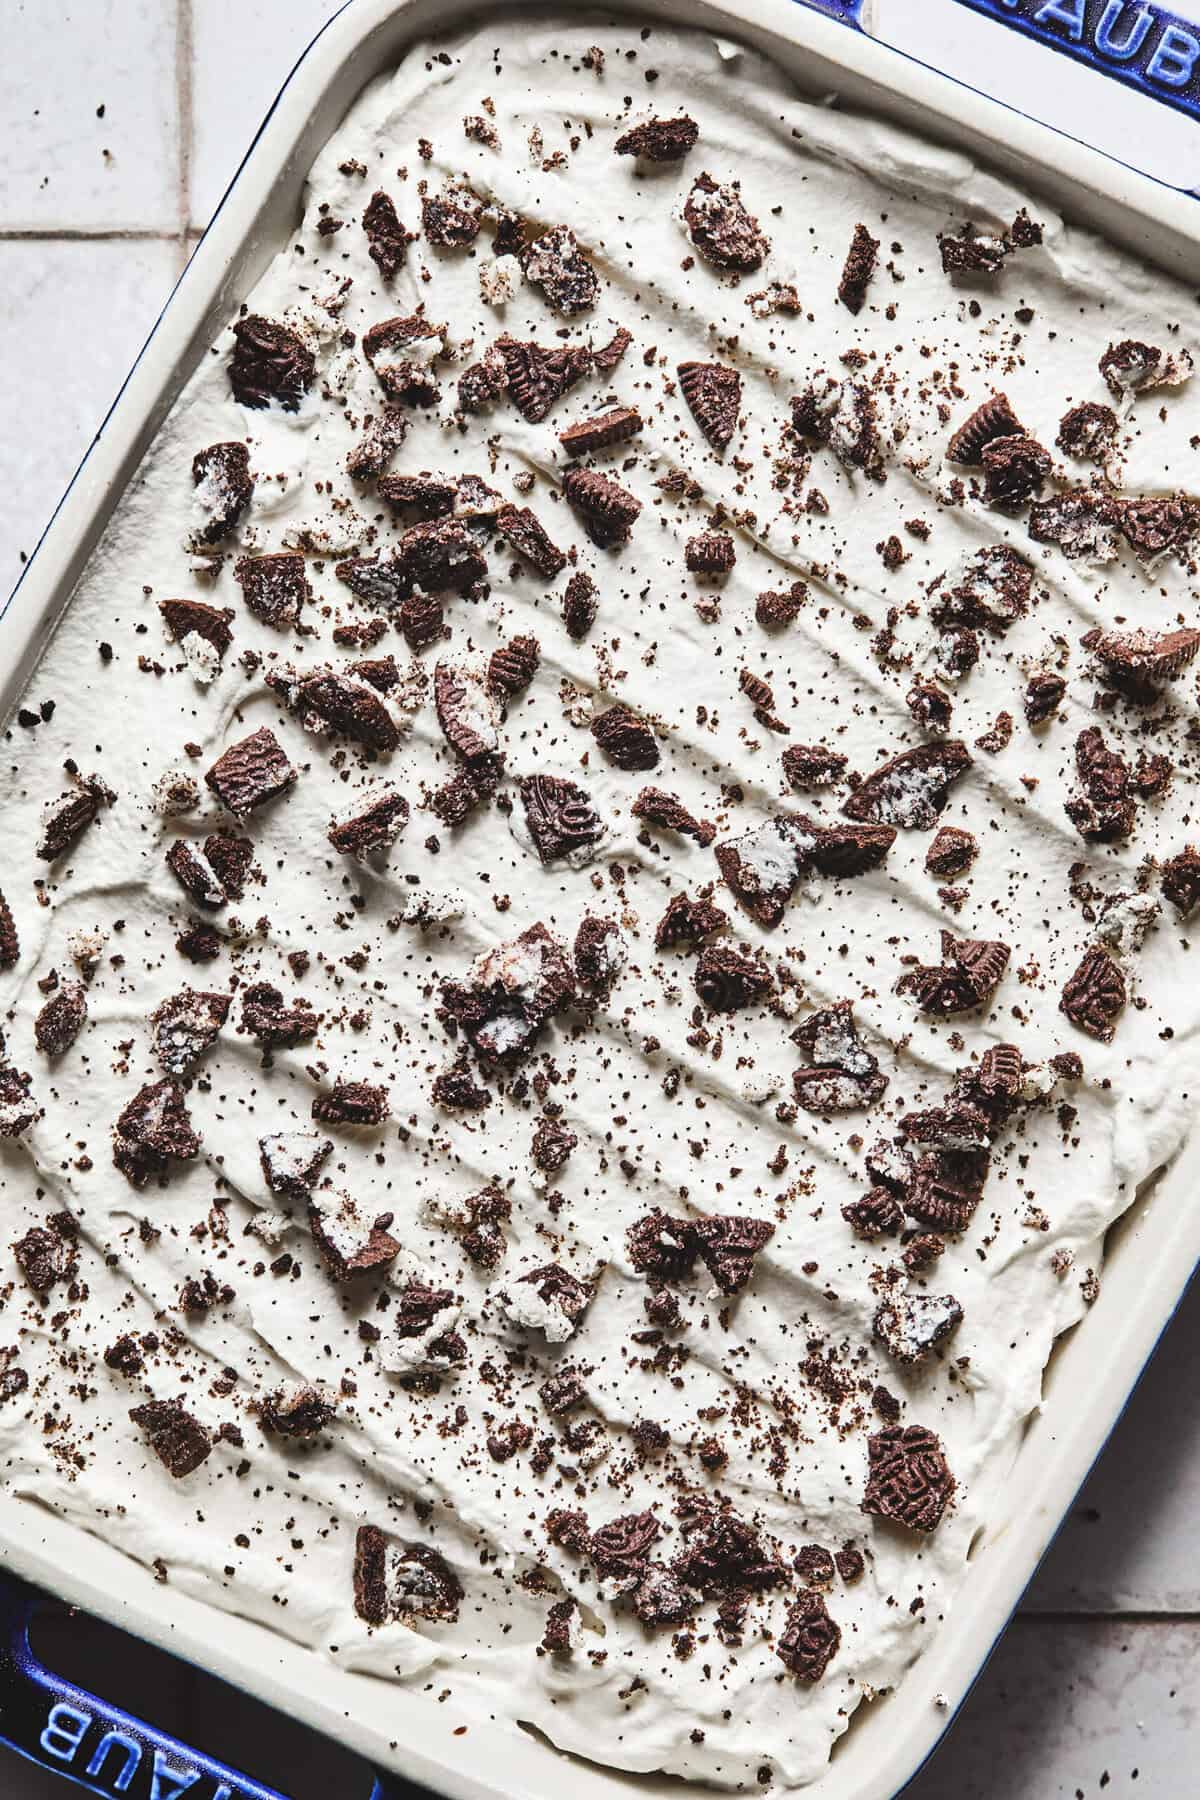
- Make the Whipped Cream Layer & Freeze: Lightly whip the cream and the powdered sugar together until it only just holds its shape. Smooth it over the frozen chocolate pudding layer. Crumble the 2 remaining Oreos over the top. Freeze for a final 4 hours, or overnight.
- Serve & Enjoy: Take the dessert out of the freezer to thaw for 1hour before slicing to get clean slices. Leave the slices to stand for a further 10-15 minutes before serving.
Expert Tips
- Use softened ice cream. Let the ice cream sit out for 10 to 15 minutes so it’s scoopable and easy to spread. Too hard and it will tear the crust, too soft and it can melt into a puddle. It’s best to aim for somewhere in between.
- Cool the pudding properly. If you pour it over the ice cream while too hot, it will melt the layer underneath. Stirring it often while it cools keeps the texture silky and prevents a skin from forming.
- Don’t rush the freezing. Each layer needs time to set so you get clean, distinct layers in the final dessert, so be sure not to rush that process!
- Slice with a warm knife. Run your knife under hot water and wipe it dry before cutting. This makes it much easier to get neat squares or rectangles!
- Play with flavors. While vanilla ice cream is classic, peppermint, cookies-and-cream, or even strawberry are amazing swaps. Just keep the rest of the Oreo dessert recipe the same.
FAQs
It will keep well in the freezer for up to 1 month. Just be sure it’s tightly covered to prevent freezer burn.
Absolutely. While homemade pudding makes this no bake Oreo dessert taste extra special, a box of instant chocolate pudding mix will save time and still taste great.
More Dessert Recipes to Try
When you make this recipe, snap a photo and tag me on social – I love connecting with you and seeing what you’re up to in the kitchen!
No Bake Oreo Ice Cream Dessert
Ingredients
For the Crust
- 24 Oreo cookies
- 2 tbsp melted butter
For the Ice Cream Layer
- 2 ½ cups slightly soft vanilla ice cream
For the Chocolate Pudding Layer
- 1 egg yolk
- 1 tbsp cornstarch
- 1 cup milk, divided
- ¼ cup sugar
- 2 ½ tbsp cocoa powder
For the Whipped Cream Layer
- 1 ½ cups whipping cream
- ½ tsp powdered sugar
- 2 oreos
Instructions
- To make the crust, blitz the Oreos in a food processor until you have a light sand. Add the butter and blitz until it is like rubble. Press into the bottom of a roughly 10” x 6” dish and use the bottom of a measuring cup to make sure it is smooth and well compacted.
- Spoon over the semi-melted ice cream and use a spatula to smooth it into a single layer. Place in the freezer for 1 hour to firm up again.
- To make the chocolate pudding, whisk together the egg yolk and cornflour, adding splashes of 1/4 cup milk to keep the mixture smooth. Stir together the sugar, cocoa and remaining 3/4 cups of milk in a small saucepan. Heat until just boiling, then remove from the stove. Whisking constantly, trickle in the egg yolk mixture, then return the pudding to a medium heat. Simmer, whisking often, until the mixture has figured to a thick but still pourable pudding. Leave it to cool for 10 minutes, whisking often to help cool it down and to prevent a skin from forming.
- Pour the slightly cooled pudding over the ice cream layer, smooth the top, then freeze for a further 1 hour 30 minutes.
- Lightly whip the cream and the powdered sugar together until it only just holds it’s shape. Smooth it over the frozen chocolate pudding layer. Crumble the 2 remaining Oreos over the top. Freeze for a final 4 hours, or overnight.
- Take the dessert out of the freezer to thaw for 1hour before slicing to get clean slices. Leave the slices to stand for a further 10-15 minutes before serving.
Notes
- This dessert will keep well in the freezer for up to a month.
- Peppermint or strawberry ice cream will work well in place of the vanilla.
Nutrition
Nutrition information is automatically calculated, so should only be used as an approximation.


Can you make this in an icecream machine?
I haven’t made this recipe in an ice cream machine, but it should probably work! I can’t guarantee it though because I haven’t tried it myself.
So I made this and it was super delicious! BUT! It got pretty icy. Do you have any tips or recommendations to avoid it, did yours get icy? I stored it in low flat shallow containers!! Thanks!! 🙂
Ah, this ice cream will be the death of me – I can’t stop eating it!! As for any icy texture, I haven’t had that issue before so I really can’t say for sure… were your containers & lids airtight?
Hi, I just came across this post on Pinterest and I was wondering, do you have to heat all these ingredients in a sauce pan, or do you just combine them in a mixing bowl?
You just combine – no heating required!
I was wondering if it would still work if I put it all into one big container and froze for 24hours?
I can’t promise how long it will take to freeze completely but you can definitely freeze it in one big container. 🙂
This looks amazing. Very very good job with the photography.
Love your blog as well.. Cheers!
Ice 🙂
I saw this on Tastespotting and had to come over. Unlike you, ice cream is not my go-to snack, but your recipe and pictures make this look insanely good. Pinned to try and following on G+.
I don’t know how you kept from eating any while photographing this! It looks so utterly delicious. Your photos are gorgeous as well.
KC
Oh my gosh I didn’t! Seriously, this was my lunch, ha!!
Okay, seriously. You have a gift for food photography.
This is only the 2nd post I’ve looked at of yours and it has me drooling too 😉
Ha, thank you so much! I’ve worked so hard on my photography, I can’t tell you how much it means to hear you say that!!