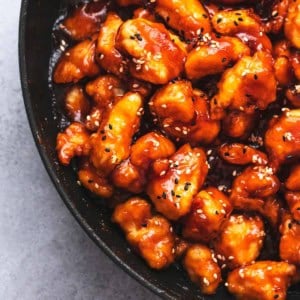
Sticky Sesame Chicken
This post may contain affiliate links. Please read our disclosure policy.
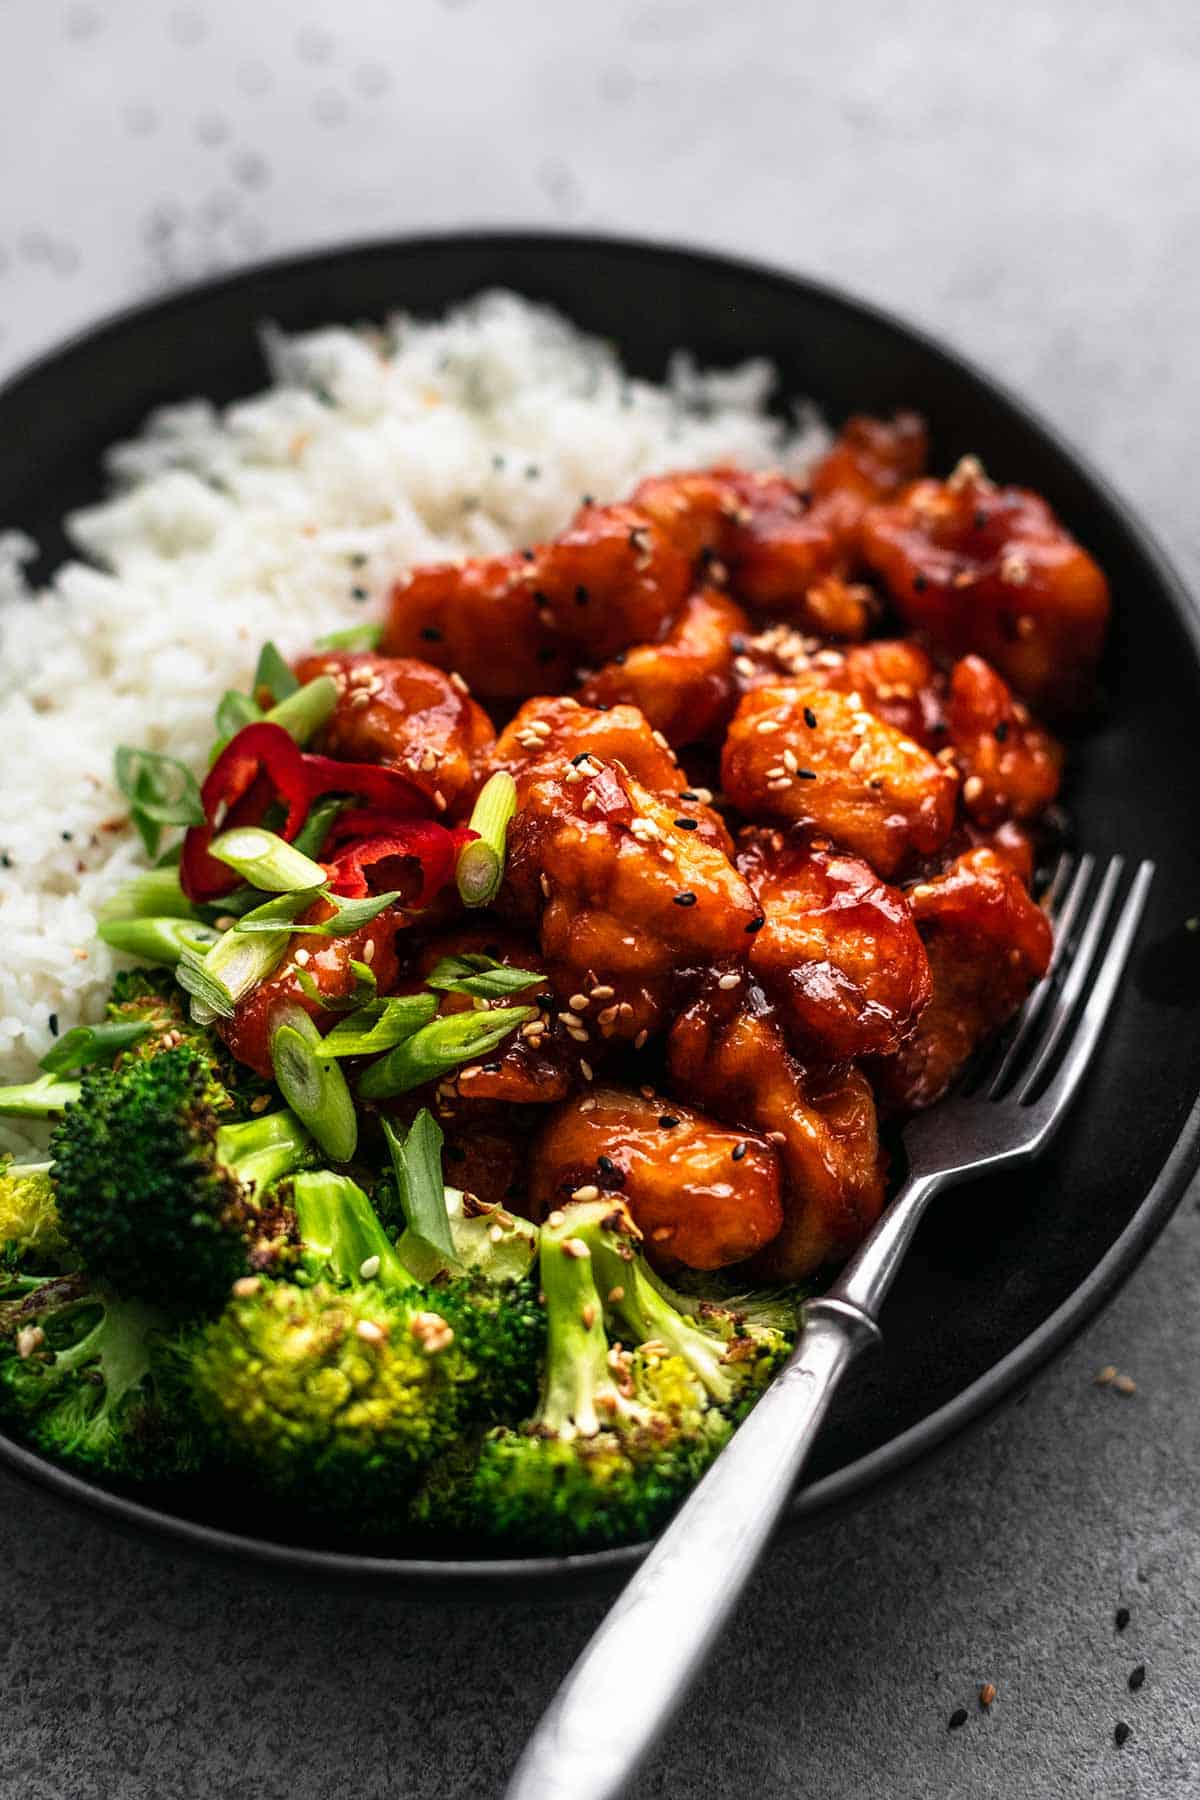
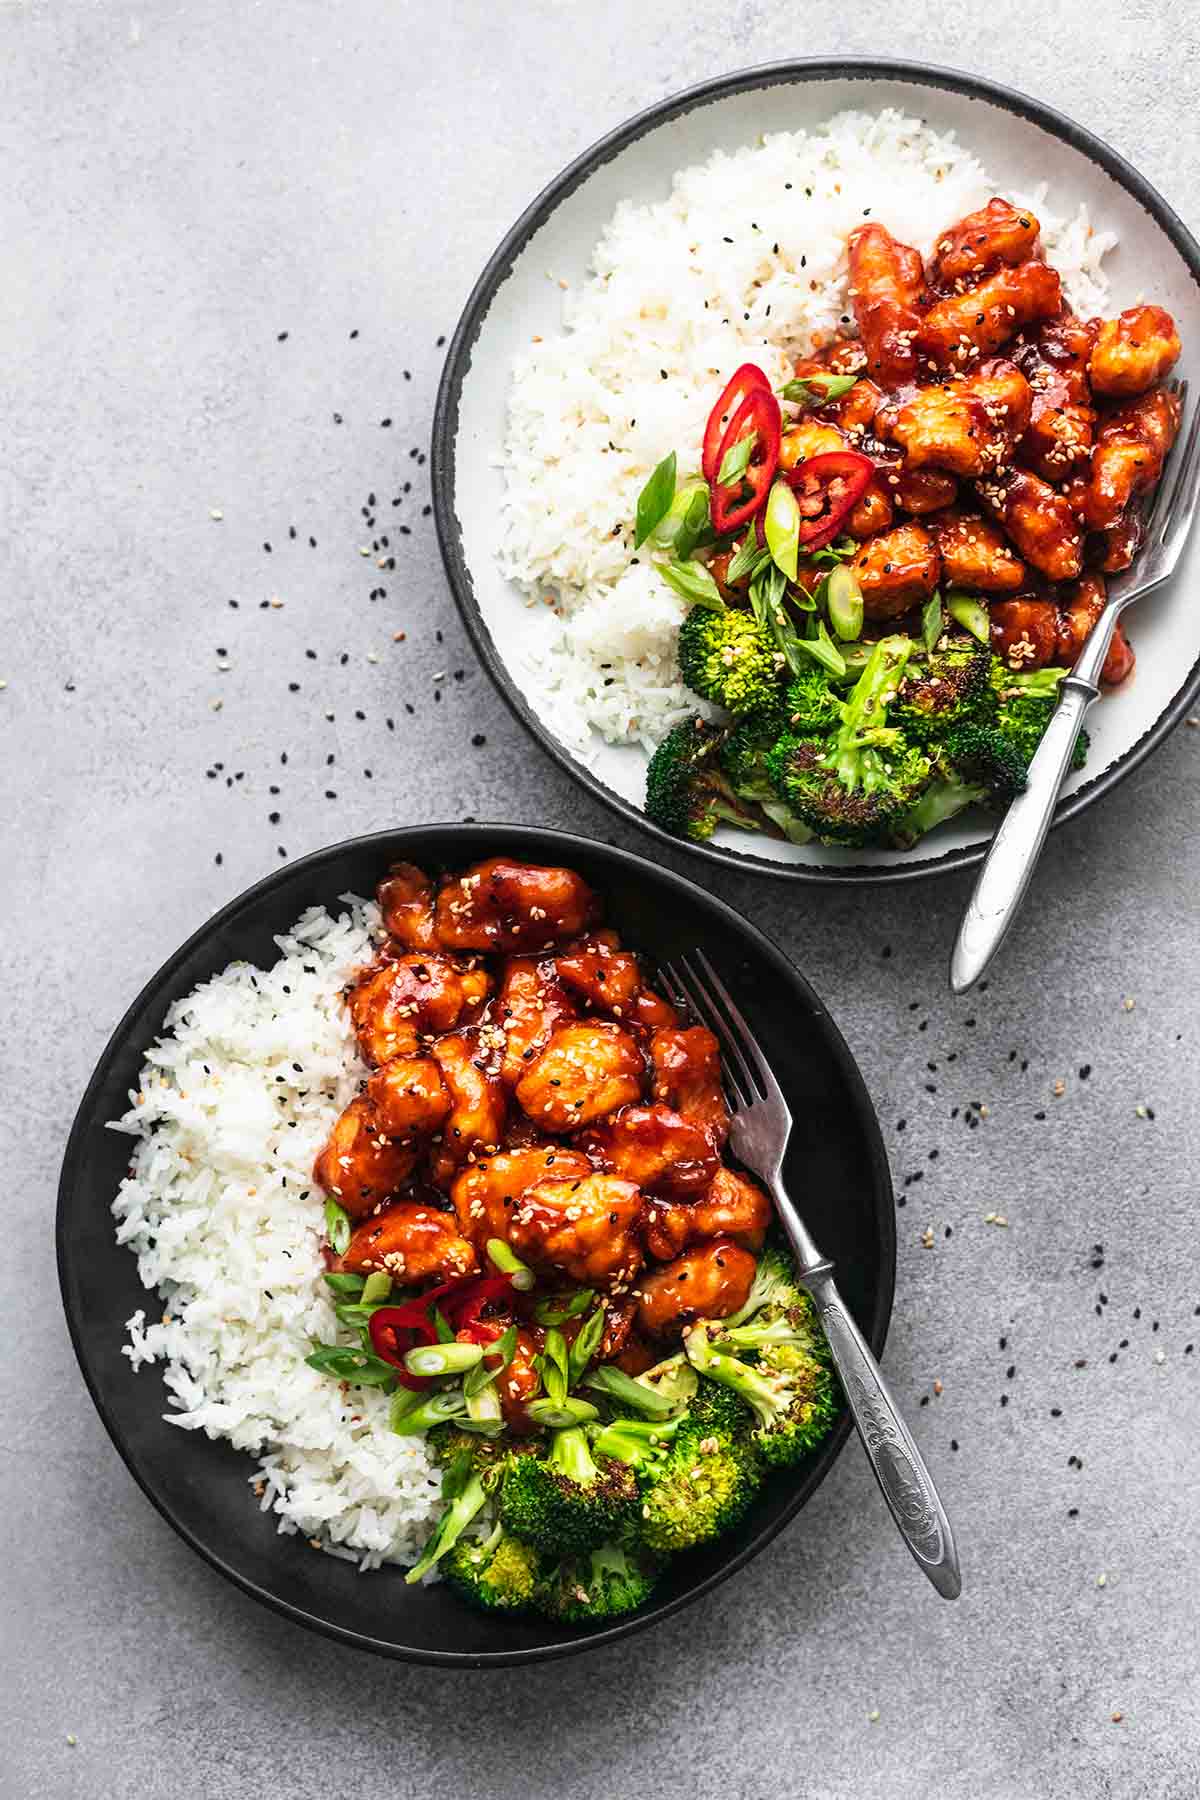
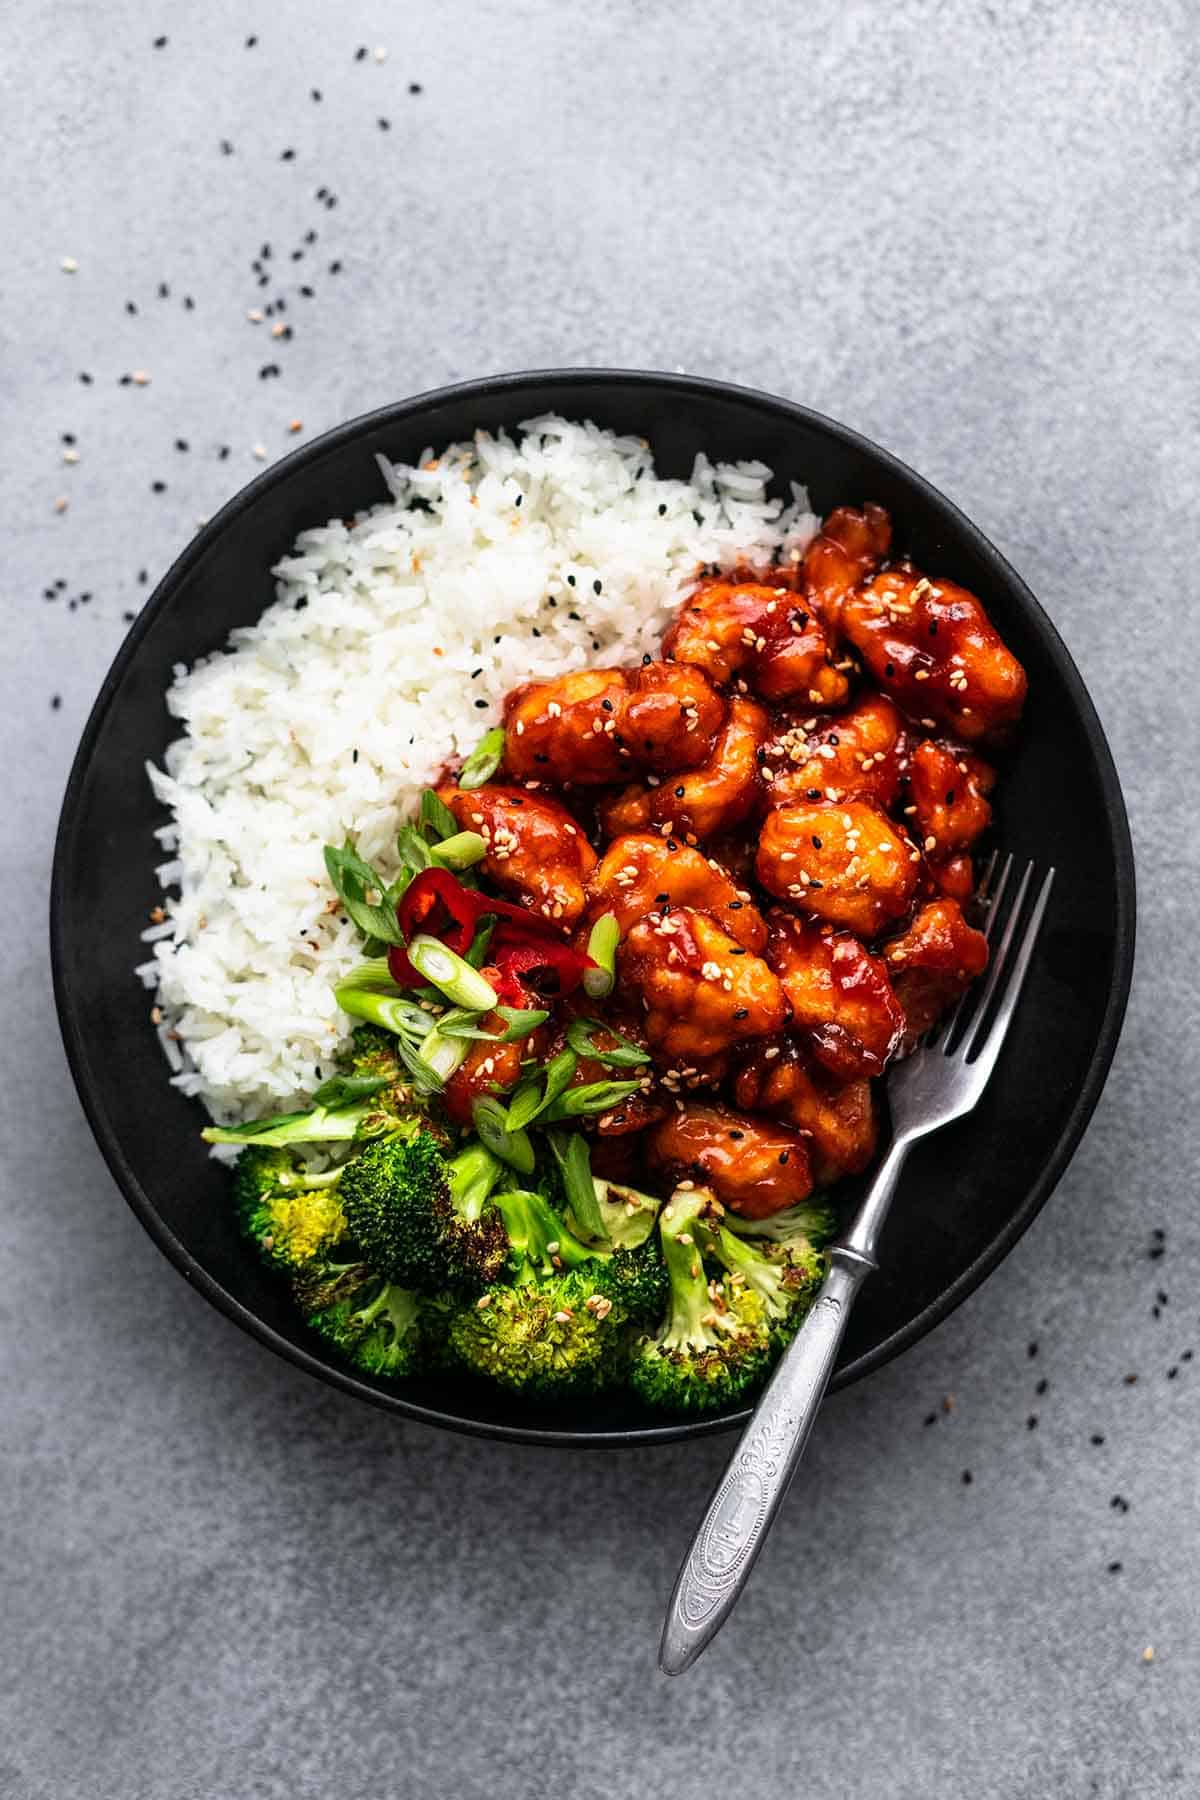
This better-than-takeout, 30-minute Sticky Sesame Chicken is so super easy to make and so ridiculously delicious, you’ll never need to order this Chinese takeout dish again.
Looking for more Asian-inspired takeout dishes like this chicken recipe? Then try my popular posts for Sticky Asian Grilled Chicken, Asian Citrus Chicken Salad, and Asian Chicken Lettuce Wraps.
It’s no secret that I love Asian-inspired takeout-style dishes. LOVE them. This sticky sesame chicken it’s SO good! While there may be about a hundred different ways to make honey sesame chicken, I am going to go out on a limb here and tell you that this one has to be one of the very best sesame chicken recipes out there, if not the best. Seriously!
I know you’re feeling slightly doubtful but just take a look at that photo and tell me if you don’t just want to dive right into it? Thought so!
Why This Recipe Works
It’s easy, it’s delicious, it’s great for leftovers…I could go on and on about what makes this sesame chicken recipe so great!
Easy to make — This sticky chicken is so amazing in part because it’s so dang easy. Done in less than 30 minutes, you really can’t beat that! That means you can prepare and dive into this chicken dish in less time than it would take for you to order take out from your favorite restaurant. And it’ll taste better and be healthier for you too!
Versatile — Use boneless, skinless chicken breasts or chicken thighs for crispy sesame chicken. Add cilantro instead of fresh green onions, use brown rice instead of white…you get the idea. Make it yours!
Great leftovers — This sesame chicken keeps well in the fridge for up to 3 days (that is, of course, if you have any left). To reheat, pop in the microwave just till heated through or put on a sheet pan and pop in the oven at 350 for about 5-10 minutes, again, till just heated through.
Easily doubles — I have a feeling you’re going to adore this dish as much as I do, which means, you might want to double it, or at least double the sauce so you have enough to soak into the rice because you’ll want that sticky chicken sauce all over everything on your plate — trust me!
Recipe Ingredients
- Boneless skinless chicken breasts – I use the same brand of quality chicken all the time for my recipes. I recommend a quality chicken that you don’t have to trim down a ton and that isn’t too weird and chewy when you bite into it – we’ve all had that before right?
- Eggs – Large eggs are good here. You need them to help bind the flour dredge onto the chicken pieces.
- Flour – All-purpose flour is great here.
- Vegetable oil – Necessary for cooking the floured chicken in, otherwise you’ll miss out on that crispy exterior. Any veggie oil is fine.
- White rice – I use long-grain white rice, but you can use whatever white rice you like. Basmati smells and tastes sooooo good with this too.
- Sesame seeds – Add these for flavor and a bit of crunch at the end.
- Green onions – Green onions make for great garnishes and lovely color.
- Honey – Honey adds a bit of sweetness and of course the stickiness in this sticky sesame chicken.
- Ketchup – Ketchup adds a little sweetness and a lovely tomato base necessary in this sauce. I use a name brand.
- Brown sugar – I use light brown sugar in this recipe, but you can use dark brown too as there is only 1 tablespoon in this recipe.
- White vinegar – Another essential sauce component, white vinegar adds a little acidity to the sauce and a tiny bit of tanginess.
- Soy sauce – What kind of Asian dish would this be without soy sauce? But seriously, any soy sauce works in this sauce, and it adds salt and an earthy flavor. Use low-sodium if you’re worried about your salt intake.
- Toasted sesame oil – I love to add a bit of sesame oil to the sauce for the flavor.
- Salt – This is optional if you’re using soy sauce and won’t want more salt, then you can skip it. Any table salt is fine.
- Corn starch – Responsible for thickening the sauce, don’t skimp out on making the corn starch slurry.
Here’s How You Make It
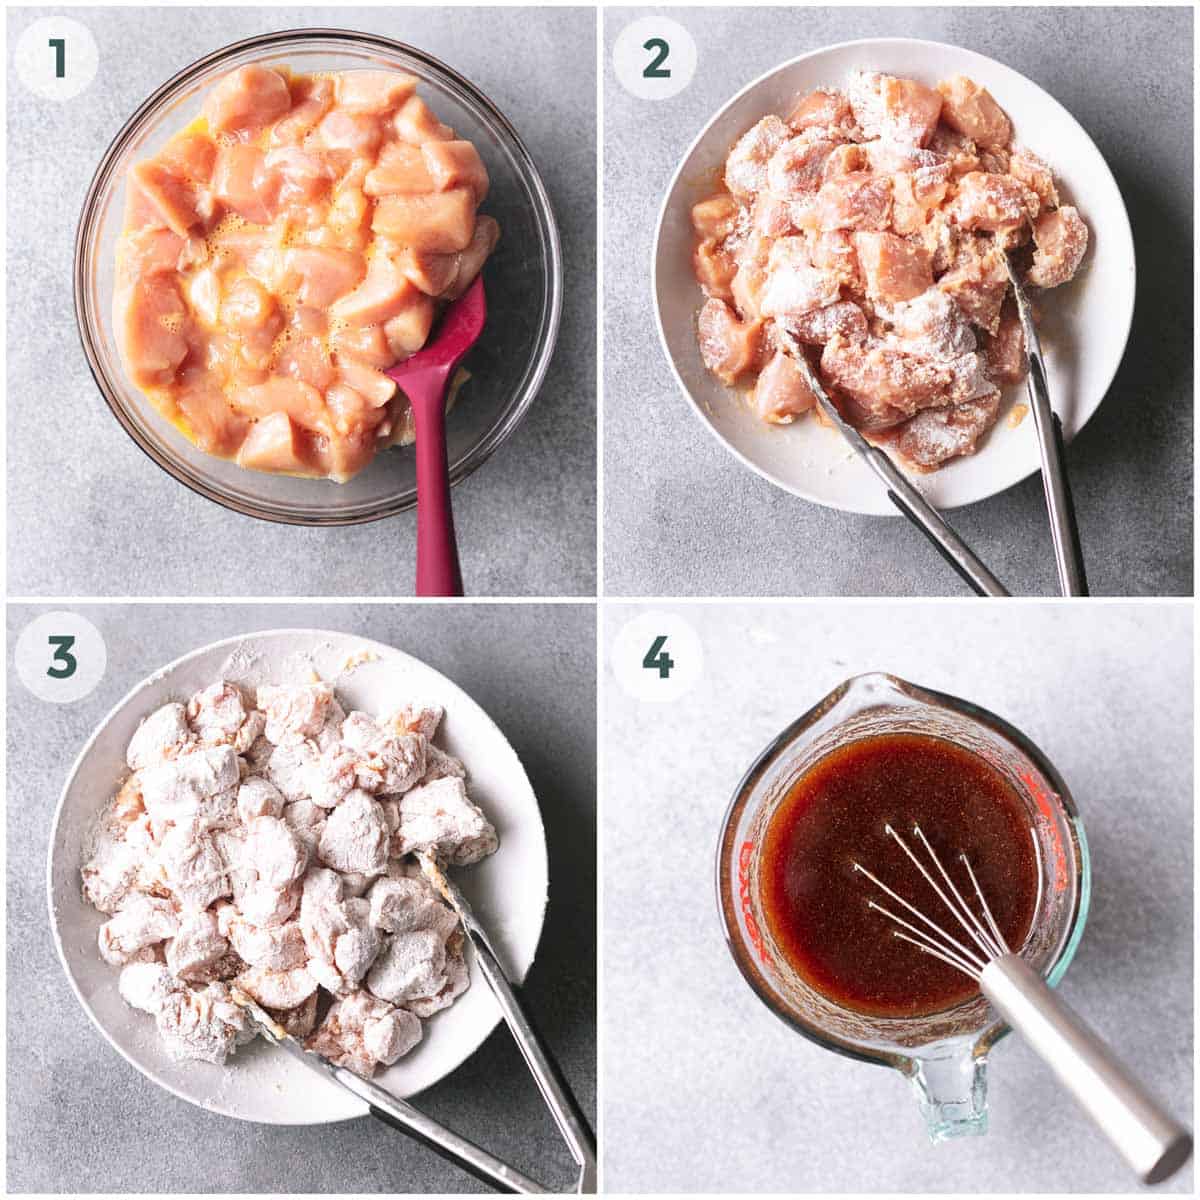
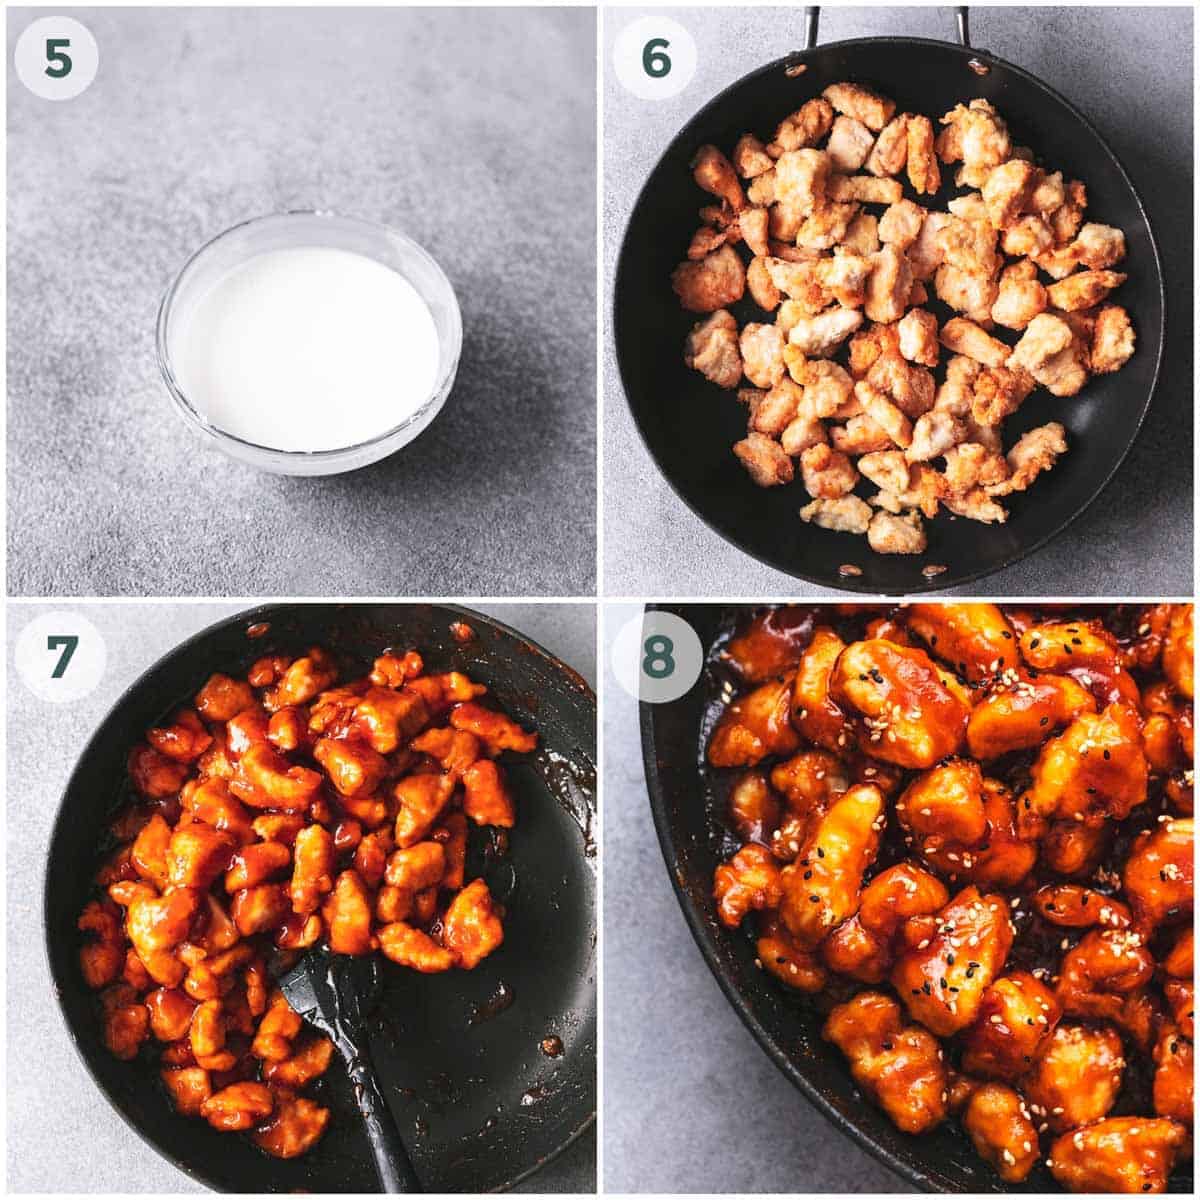
- First, make the honey sesame chicken sauce by whisking all the sauce ingredients together in a bowl. Put it somewhere handy for pouring over the chicken in a few minutes. (photo 4)
- Get out 3 shallow bowls. In them, place the beaten egg, 3 tablespoons of cornstarch, and then flour, each ingredient in its own bowl. Dip the chicken in each of the ingredients in this order: egg, flour (make sure it coats), and cornstarch (again, make sure it’s tossed to coat). (photo 1-3)
- In a large pan or skillet, heat the oil up over medium heat. To the oil, add the coated chicken pieces and cook, making sure all sides of the pieces of chicken are cooked evenly and well-browned for really crispy chicken. This will take about 5-10 minutes. (photo 6)
- Now pour the sauce over the chicken and bring it to a boil. (photo 7)
- Whisk together the cold water and an additional 2 tablespoons of cornstarch in a small bowl. When the starch is dissolved, add this mixture to the skillet and stir in. This will thicken the sauce mixture. (photo 5)
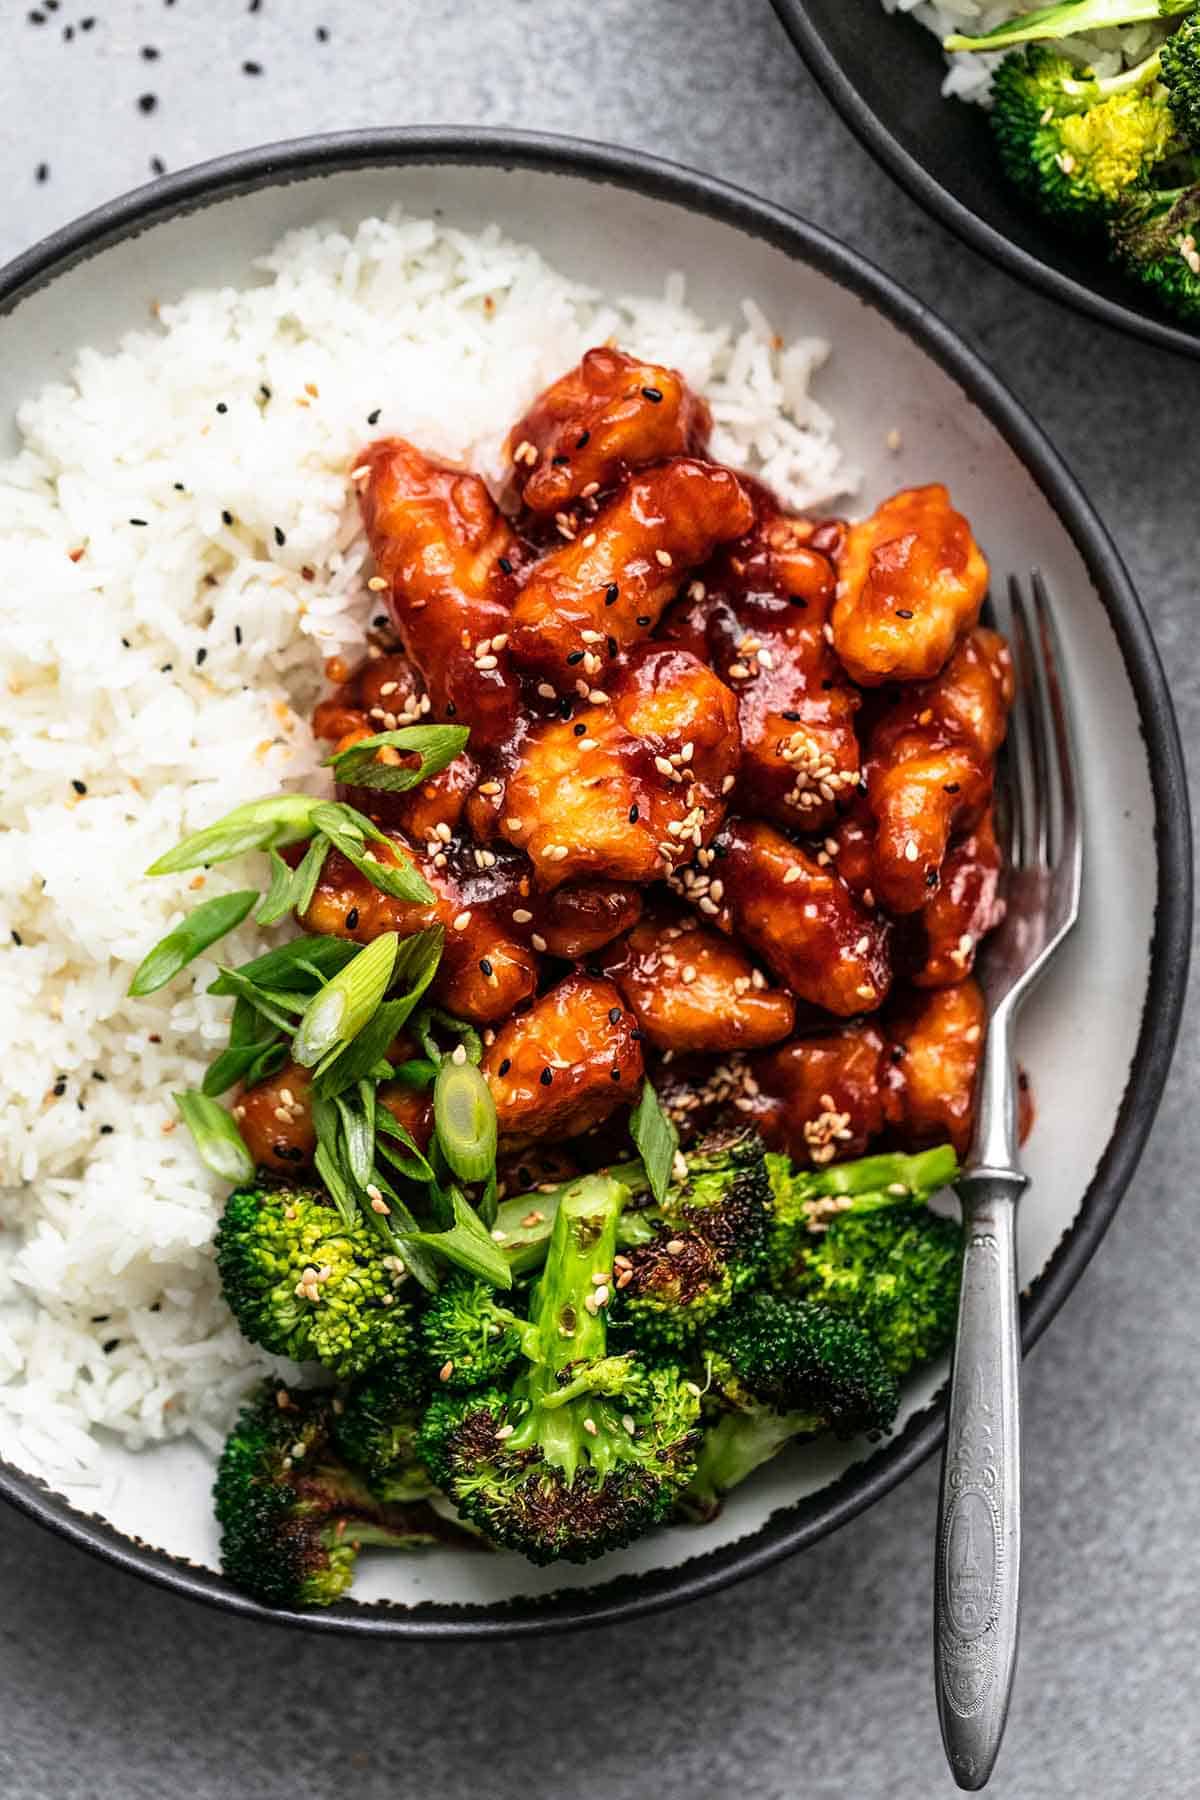
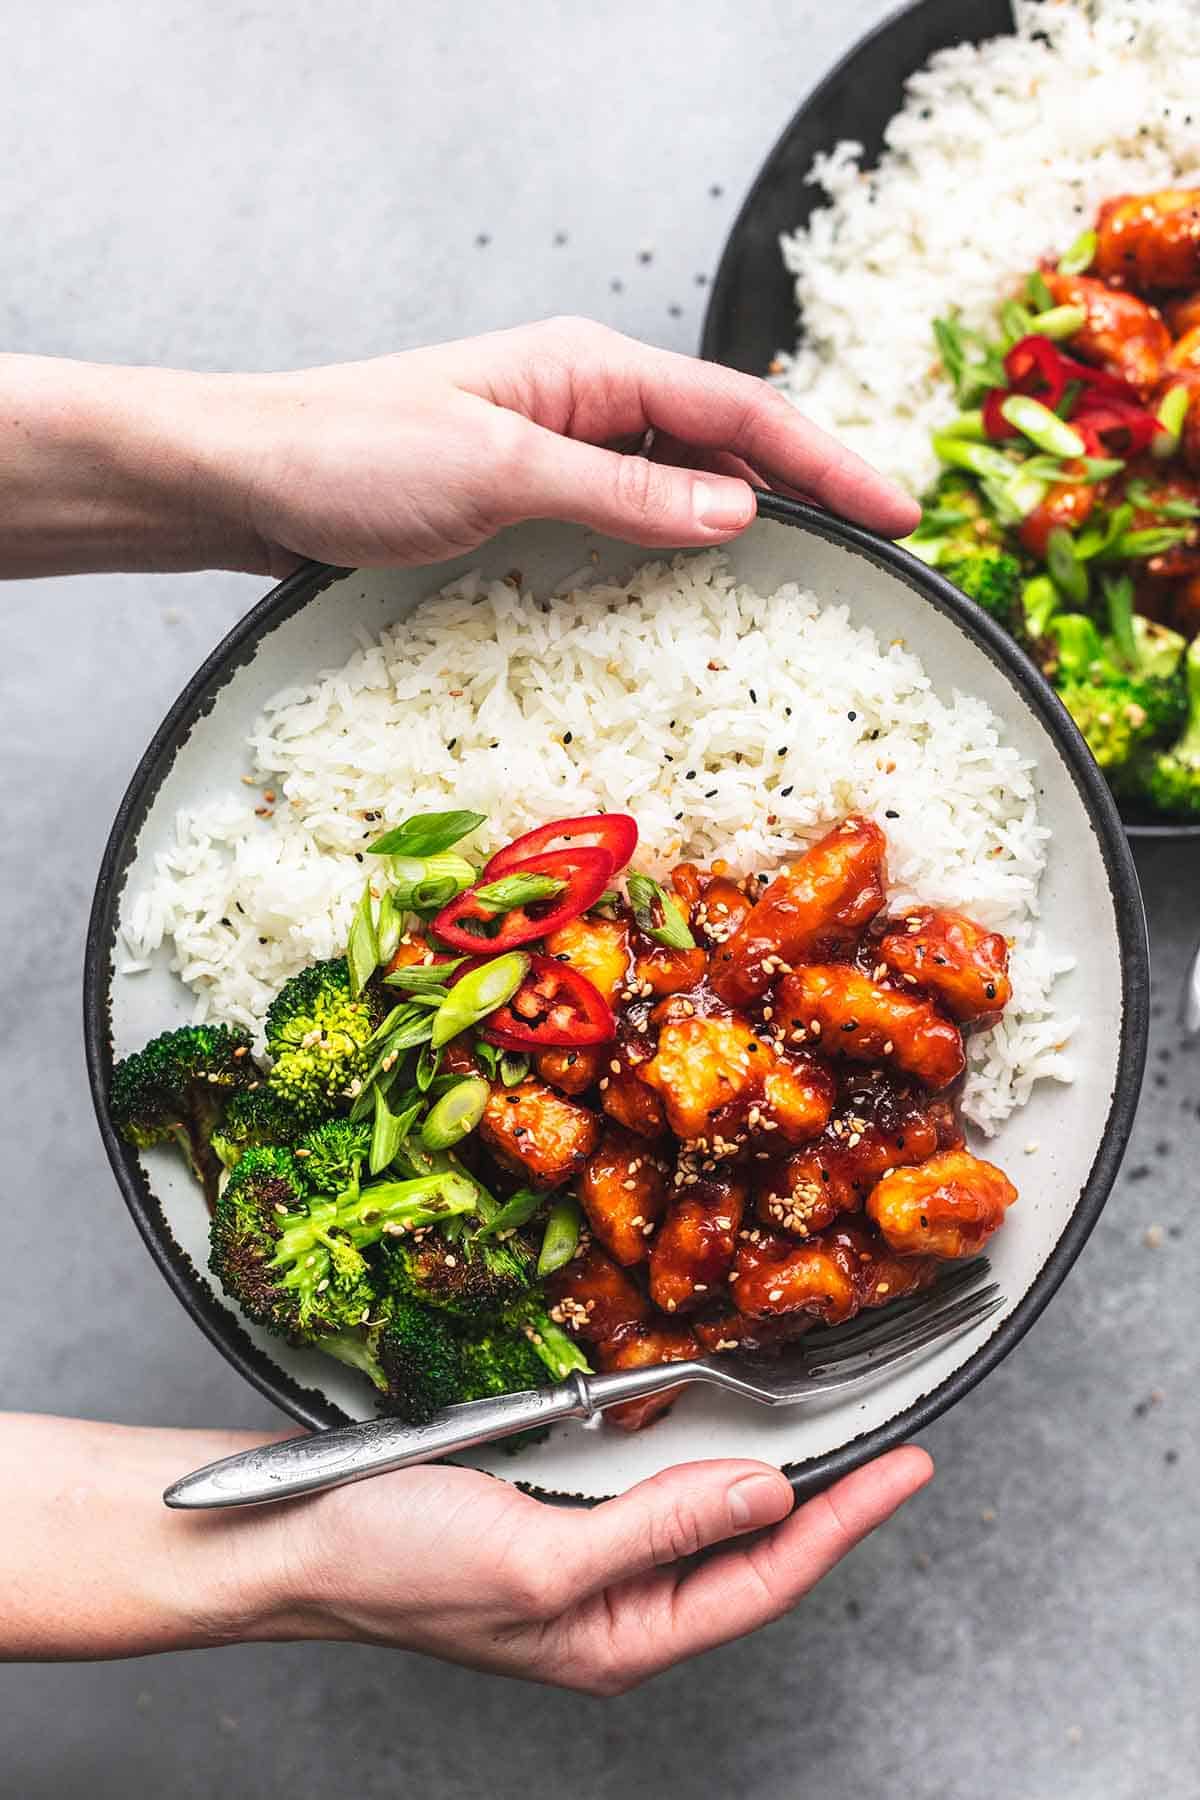
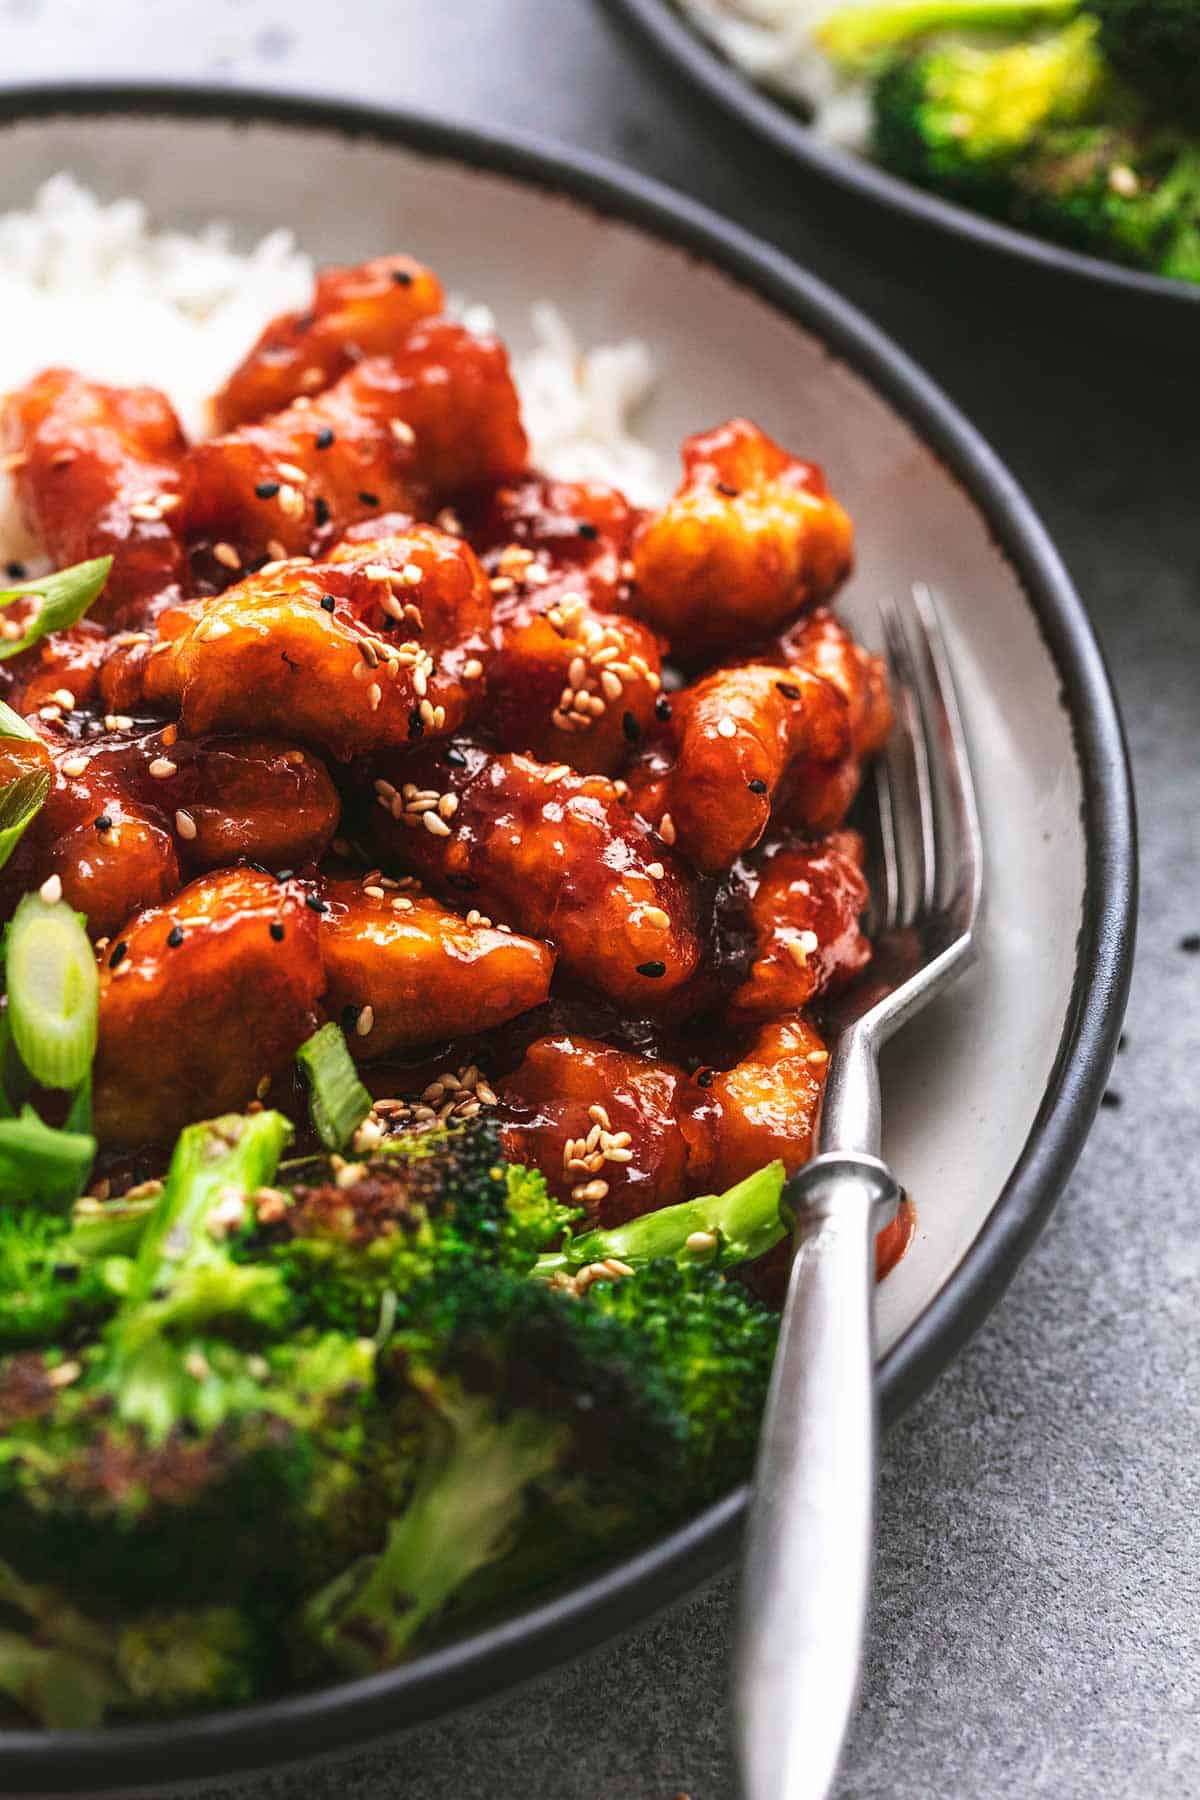
- Once the sauce thickens, serve this sticky chicken recipe over rice and top with sesame seeds and green onion slices if you like. (photo 8)
Ideas for Serving this Recipe
- There’s just something about steamed broccoli with Asian dishes for me. In it, next to it, over it, on top of it, broccoli is my go-to veggie for Asian side dishes. You can simply steam it, roast it, or grill it, and add it to your bowl with the rice and chicken. Double that sauce if you want to roll the broccoli around in the sticky sesame chicken sauce too! (For a simple recipe, try my Roasted Broccoli.)
- I almost always serve this dish over white rice. Basmati and jasmine rice are two other rice varieties that smell so good while they’re cooking and taste delish too. Brown rice works great as well, but that takes a little more time to cook. If you’re looking for a low-carb alternative to rice, try steaming a bag of cauliflower rice and using that as your base layer for this delicious sesame chicken recipe.
- This sticky chicken recipe would also be amazing over some Asian noodles like rice noodles, udon, or soba. If you don’t have those noodles, no worries just use spaghetti or angel hair pasta.
- Make it a power bowl and get an extra dose of protein by serving your sticky sesame chicken with a slew of vegetables over quinoa.
- Of course, you can just eat this with no rice/noodles/extra veg because why not? Eat the chicken right over the stove if you want. I may or may not have done that myself a time or two!
Storage Instructions
This sticky sesame chicken will keep in the fridge in an airtight container for up to 5 days. It can be frozen in an airtight container for up to 5 months. To reheat, simply thaw and microwave till just warmed through. Make more sauce if it seems dried out and pour it over the chicken – yum!
Expert Tips
- The sauce recipe is enough to coat this chicken but if you want more to also spill onto your rice/noodles/veggies then you should double this sauce ingredients.
- If you don’t want to garnish with green onions, you can also use cilantro or parsley or skip the greenery all together and just use sesame seeds.
- And…if you don’t want to use or don’t like sesame seeds, then some chopped, toasted cashews or peanuts are also amazing sprinkled on top of this sesame chicken for just a little bit of extra crunch and flavor.
More Recipes Like This
- Sticky Chinese Lemon Chicken
- Best Ever Baked Teriyaki Chicken
- Slow Cooker Broccoli Beef
- Spicy Korean Beef Noodles
Did you make this Sticky Honey Sesame Chicken recipe? YAY! Please rate the recipe below!
Sesame Chicken Recipe
Ingredients
- 4 boneless skinless chicken breasts , chopped into 1 ½ inch pieces
- 2 eggs, whisked
- 6 tablespoons flour
- 3 tablespoons corn starch
- 4 tablespoons vegetable oil
- 3-4 cups cooked white rice, for serving
- sesame seeds, for garnish
- green onions, chopped, for garnish
Sauce
- 6 tablespoons honey
- 4 tablespoons ketchup
- 3 tablespoons sugar
- 1 tablespoon brown sugar
- 2 tablespoons white vinegar
- 3 tablespoons soy sauce
- 1 tablespoon toasted sesame oil
- ½ teaspoon salt
- 1 teaspoon garlic powder
- 1 tablespoon cold water
- 2 tablespoons corn starch
Instructions
Prepare the Sauce
- Whisk together honey, ketchup, sugar, brown sugar, white vinegar, soy sauce, sesame oil, salt, and garlic powder. Set aside.
Prepare the Chicken
- Place beaten egg, 3 tablespoons corn starch, and flour in three separate bowls.
- Dip chicken pieces in egg mixture, then flour (toss to coat thoroughly), and lastly in corn starch (toss to coat thoroughly).
- Heat oil over medium heat in a large pan or skillet. Add chicken and cook, stirring throughout to ensure even cooking, 5-10 minutes until cooked though. Use a slotted spoon to transfer chicken to a paper towel-lined dish.
- Use a couple of folded paper towels to wipe out any excess oil from the pan. Add sauce and bring to a boil over medium heat. Whisk together corn starch and water til dissolved, then whisk corn starch slurry into the boiling sauce til thickened.
- Reduce heat to medium low, add chicken back to the pan and toss to coat completely. Garnish with sesame seeds and green onions and serve over rice. Enjoy!
Notes
Nutrition
Nutrition information is automatically calculated, so should only be used as an approximation.


Can I ask why you separate the flour and cornstarch with this sesame chicken?
It’s just a precaution to make sure the chicken is evenly coated but you can totally mix them if you prefer!