4 Ingredient Soft Caramels
This post may contain affiliate links. Please read our disclosure policy.
EASY 4 Ingredient Soft Caramels you can whip up in about 15 minutes. You don’t need a candy thermometer to make these caramels and they literally melt in your mouth!
Looking for more easy dessert recipes? I have you covered with my posts for Peanut Butter Fudge, No Bake Peanut Butter Bars, Easy Microwave Peanut Brittle, and 3 Ingredient Old Fashioned Potato Candy.
Why This Recipe Works
Old-fashioned flavor — People just LOVE my mom’s candy caramel recipe. Truly, it’s famous. And, while it’s delicious, it’s one of those recipes requires a candy thermometer, a giant pot, and a LOT of pot-stirring. As much as I adore those caramels, I tend to be a slightly less patient person than my mother and need something quick and easy that still delivers a big buttery caramel flavor. That’s where this recipe comes in. Big flavor, little work. I love it.
Easy — These homemade caramels seriously are so easy to make. They only require four ingredients (5 if you decide to go all-out and sprinkle on the sea salt) and you spend about 10 minutes stirring and keeping an eye on the stove pot.
No fancy gadgets — The best part is that NO fancy gadgets (namely, no candy thermometer) are needed. Do you have a saucepan, a can opener, and a spoon? Then you are good to go!
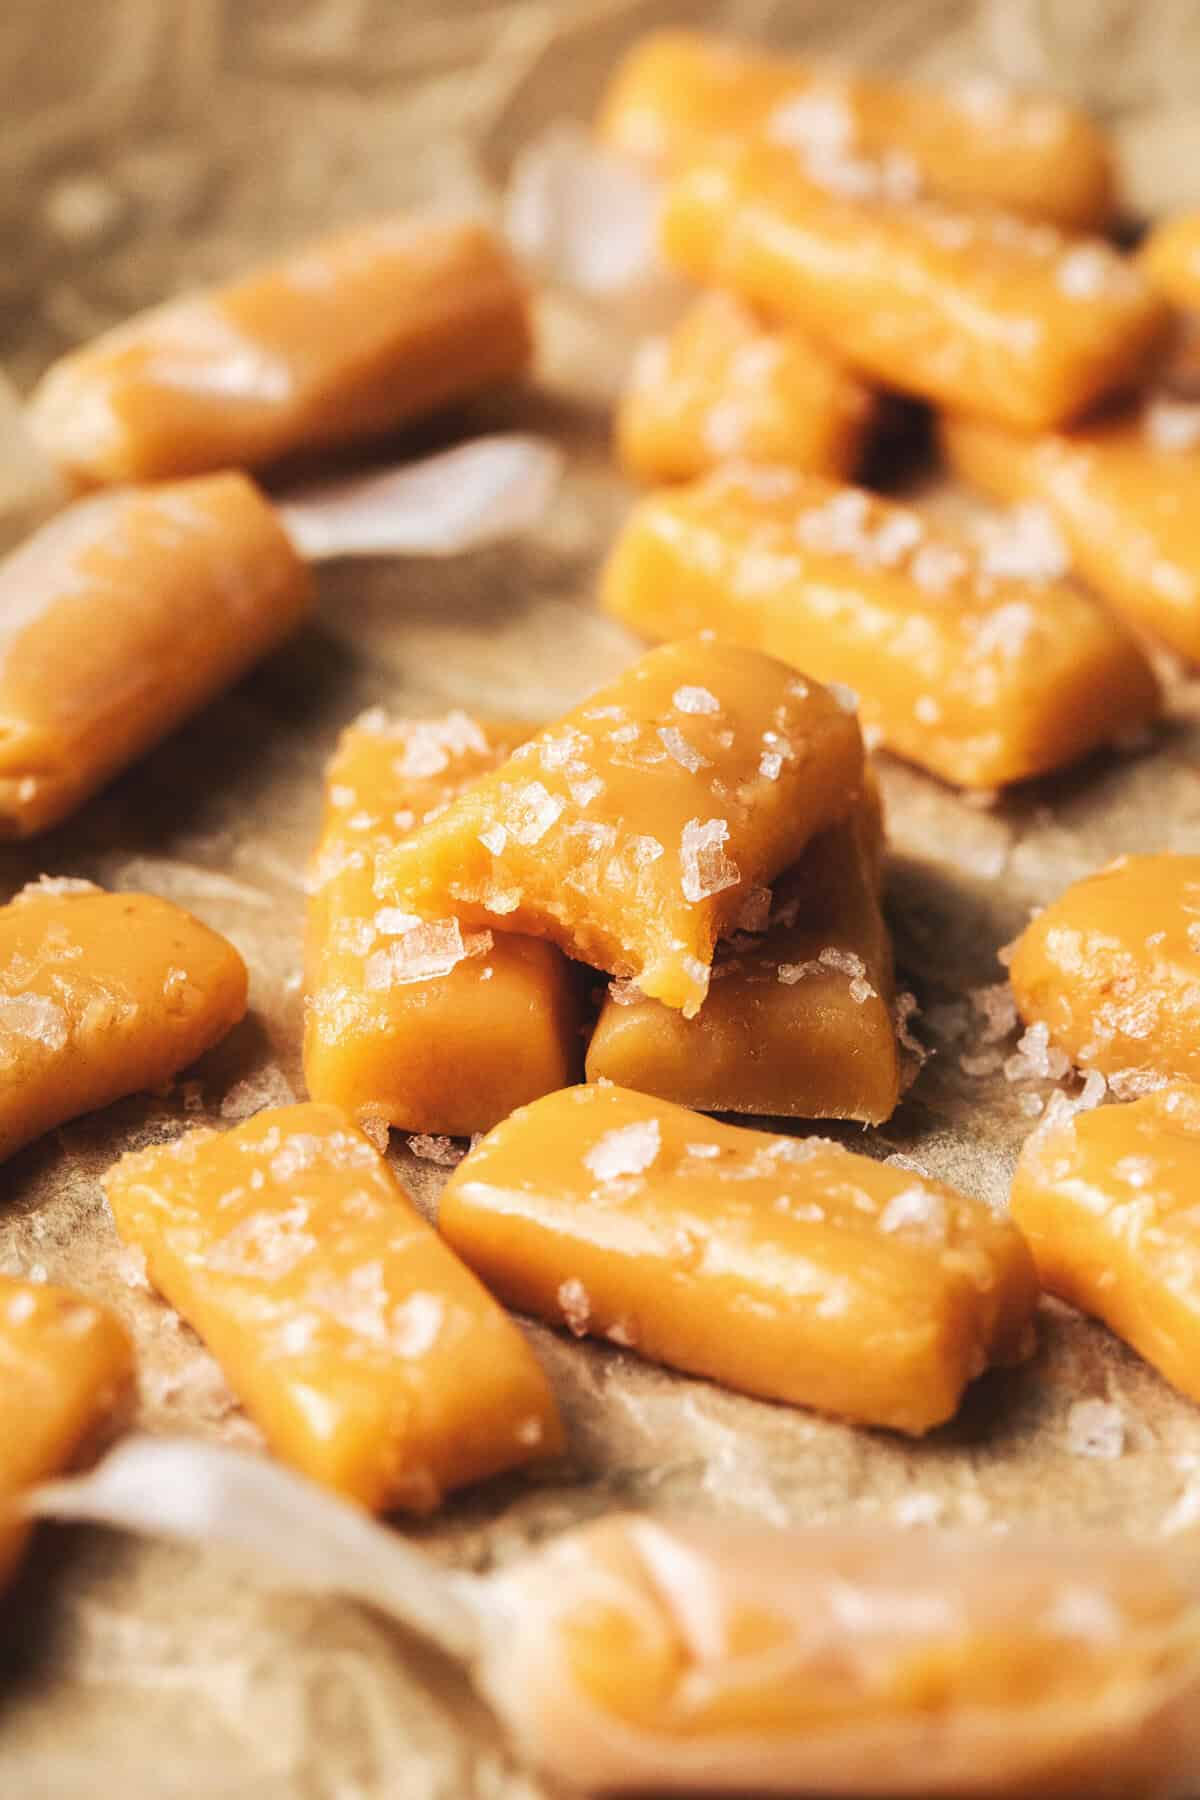
Delicious — Not only is this easy caramels recipe quick, but they are also soooooo melt-in-your-mouth yummy. BIG caramel flavor, with just a hint of sea salt (if you chose to add it). The hardest part is waiting for the caramel to cool before eating it!
Ingredients

- Sugar — Use all-purpose, white sugar here for the best-tasting caramels.
- Light Corn Syrup — Make sure you use light corn syrup because this type of corn syrup keeps the sugar from crystalizing as it cooks, ensuring a rich, chewy texture.
- Sweetened Condensed Milk — This is the trick to easy caramels because the condensed milk easily caramelizes when put to heat and helps the caramels maintain smoothness and creaminess.
- Coarse Sea Salt & Vanilla — Optional flavors you can add to the caramels but not necessary!
Here’s How You Make It
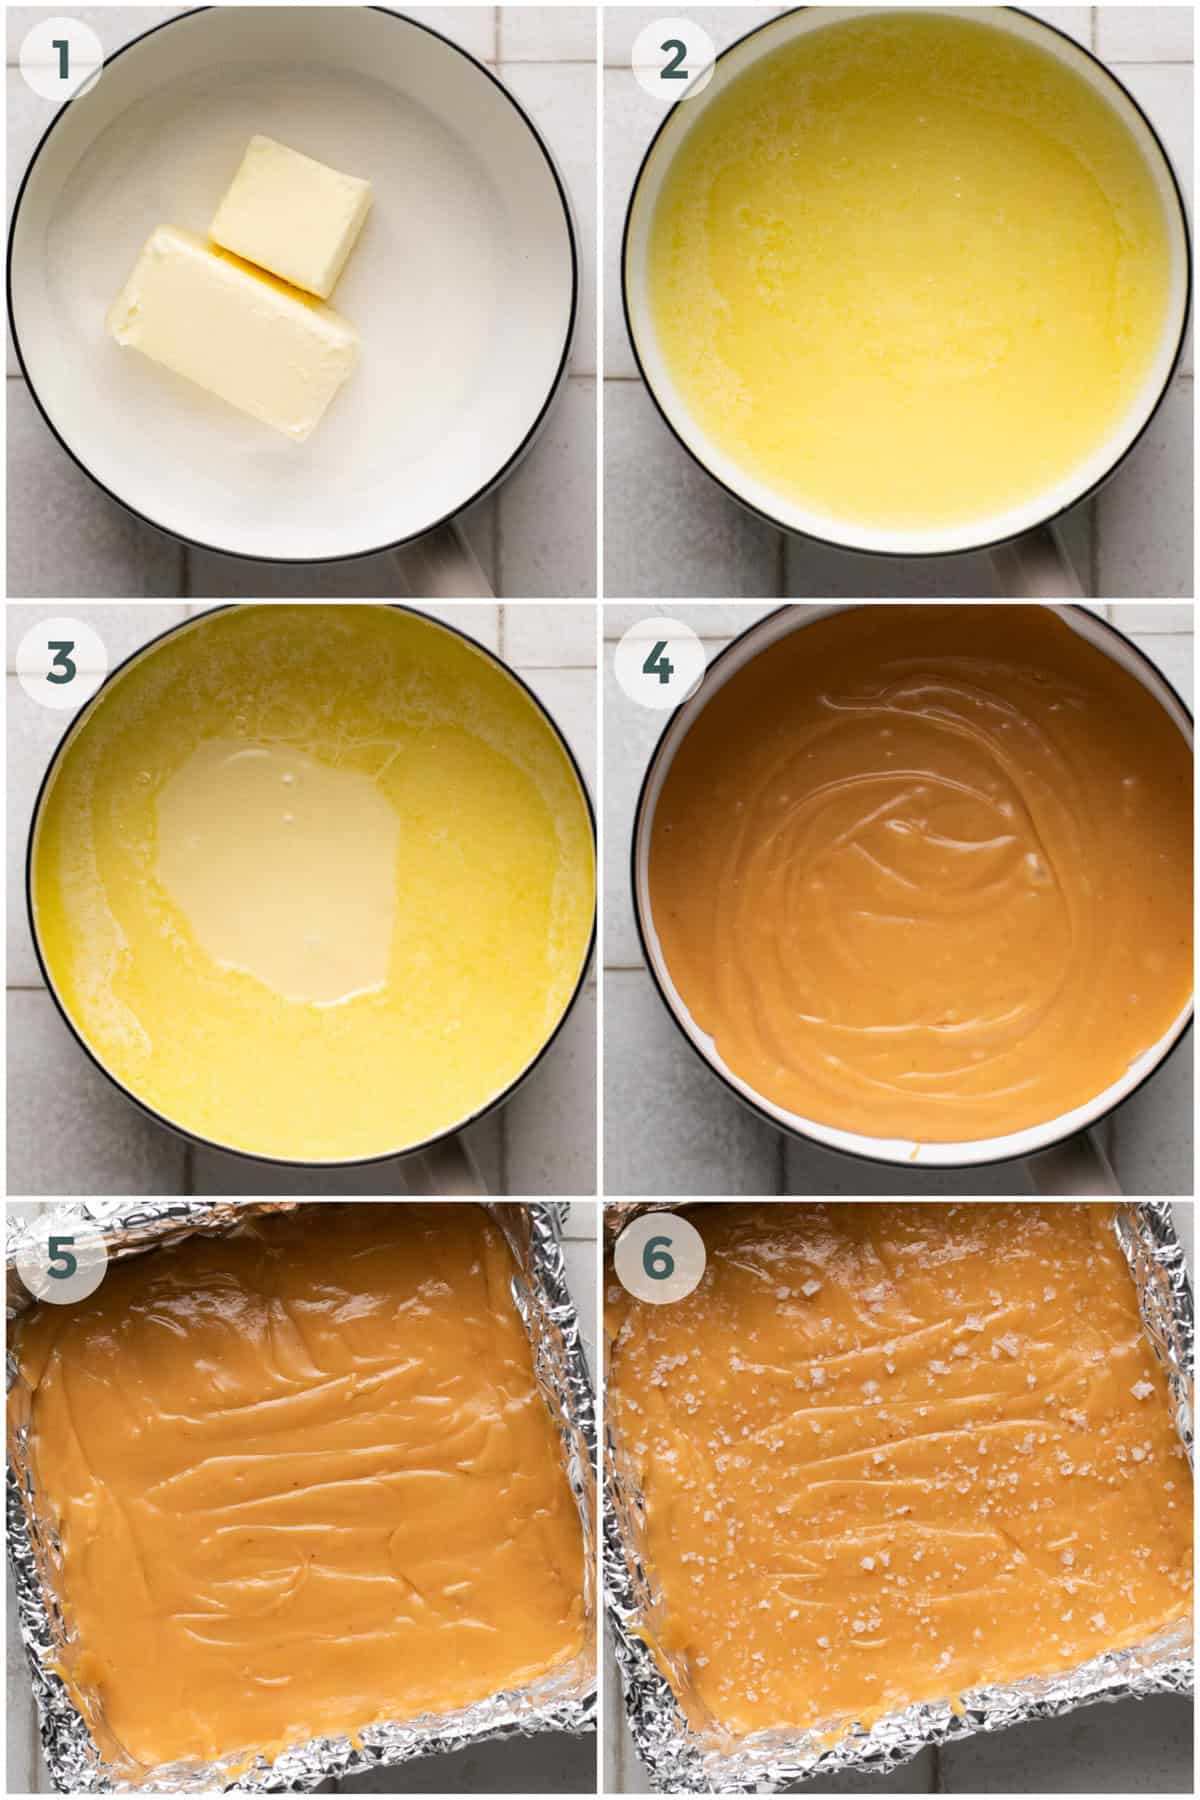
- Combine the butter and sugar in a saucepan over medium-high heat. Stir, stir, stir, till the butter is melted and the sugar has dissolved into the melted butter. They’ve become one.
- Add the corn syrup and condensed milk to the butter/sugar mixture.
- Allow the candy syrup to boil then decrease the heat and let it simmer for about 7-10 minutes or so.
- Keep stirring till the caramels have reached a deep golden color.
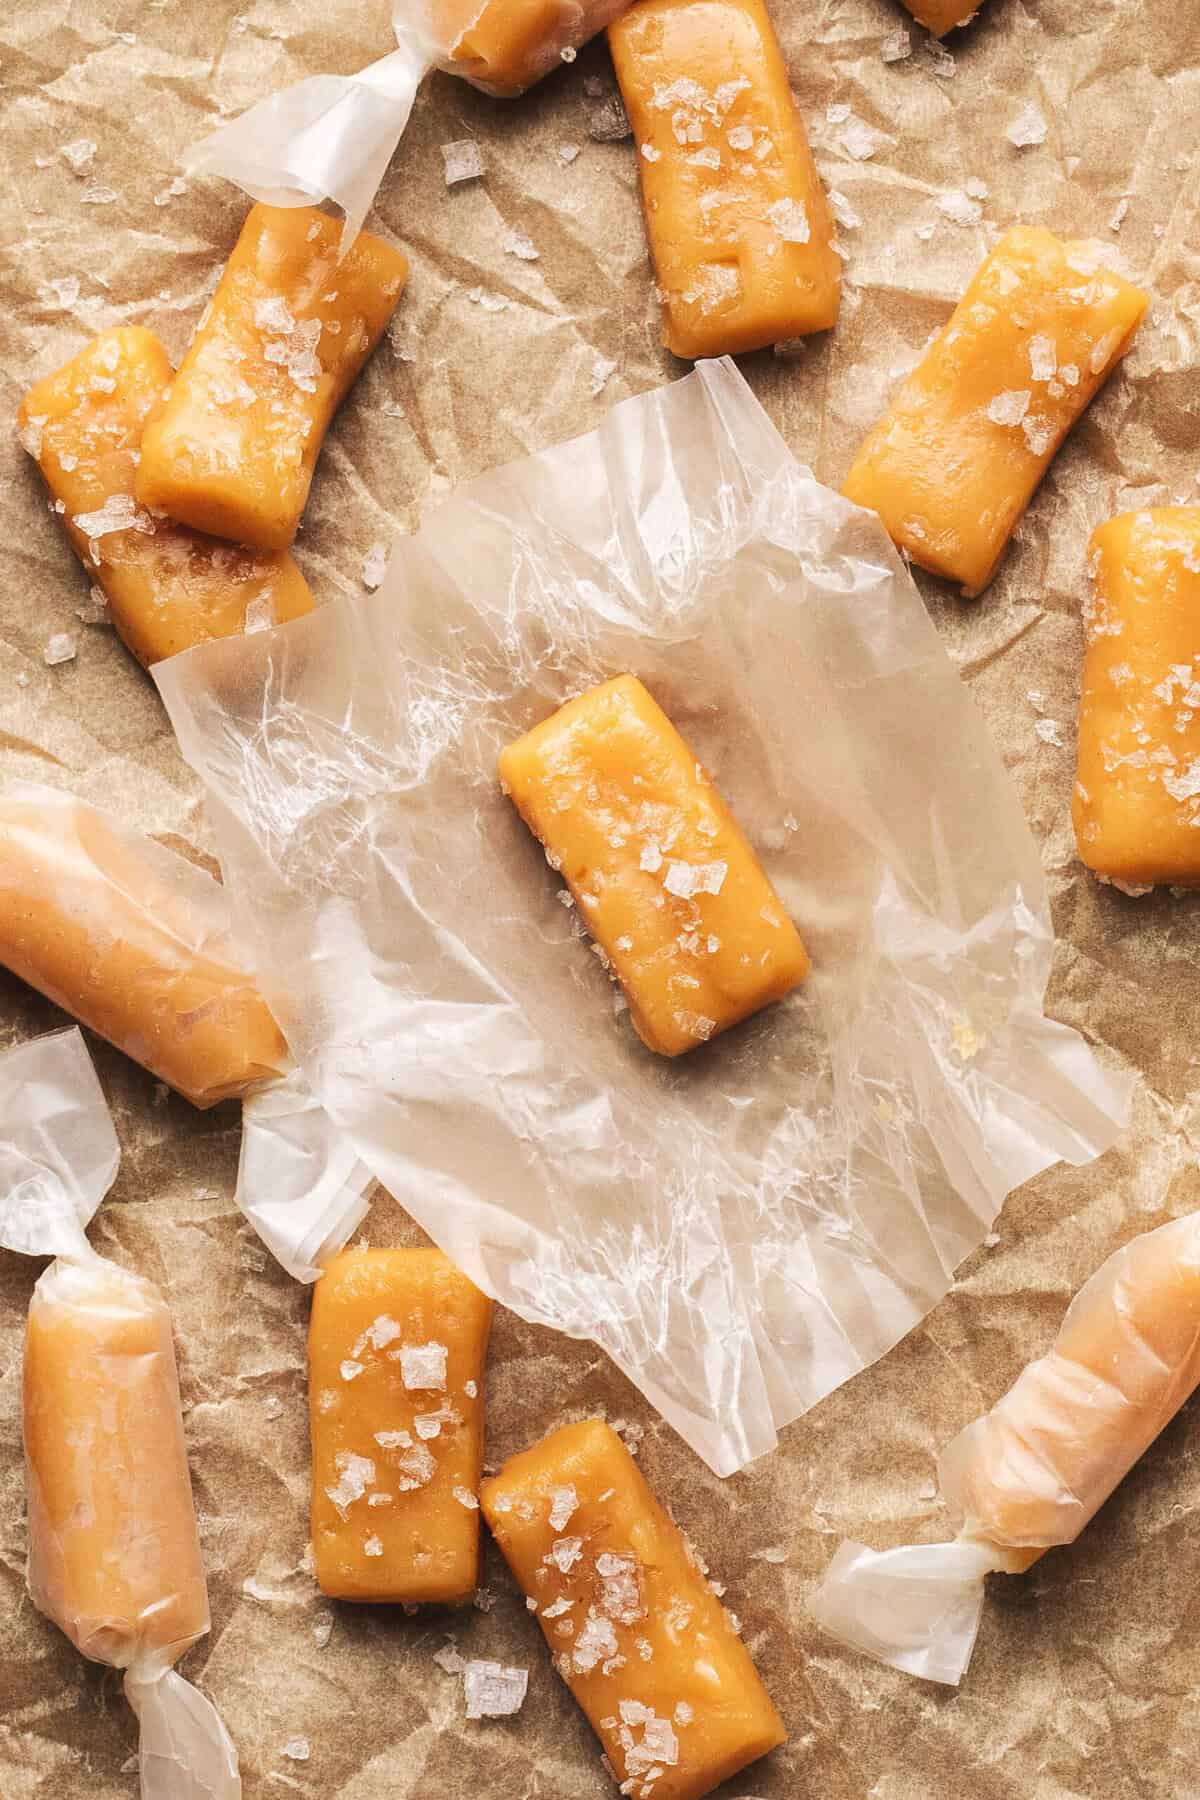
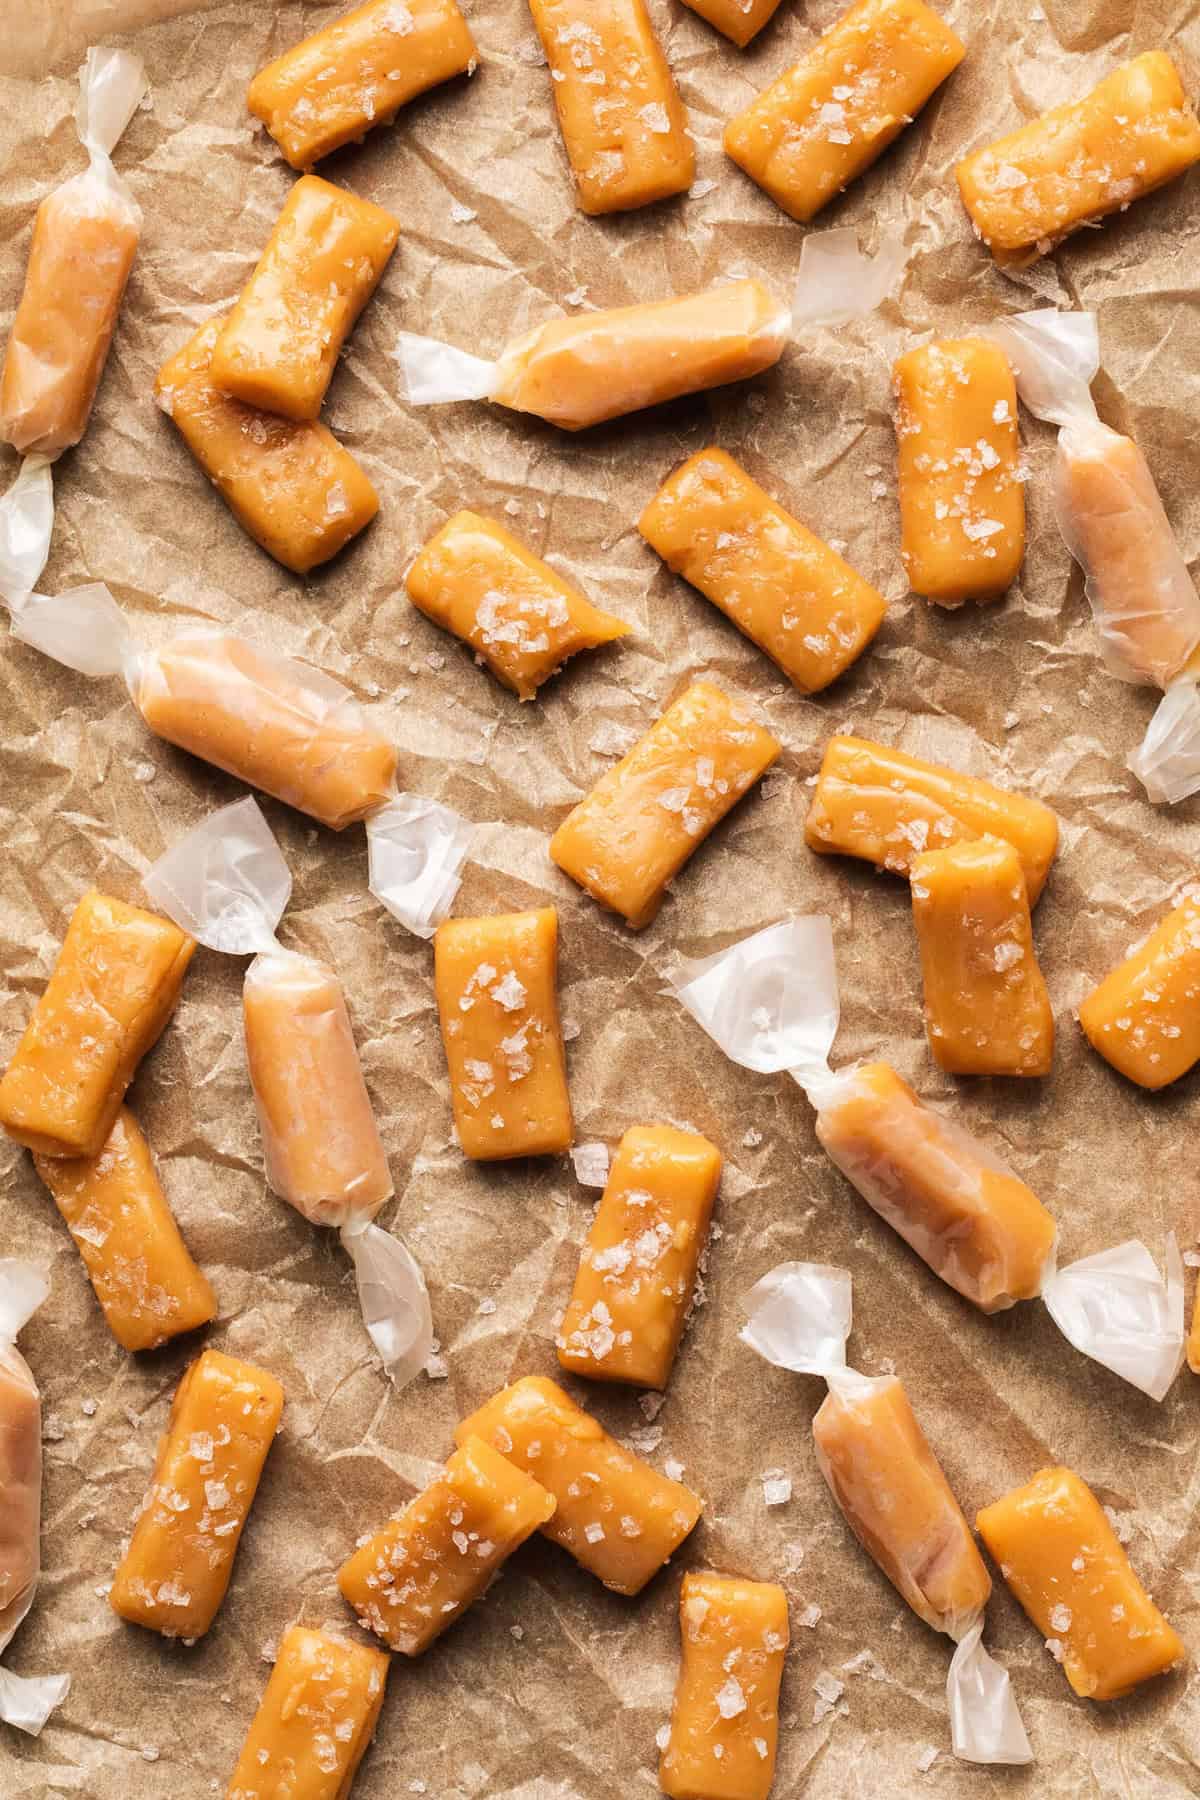
- Pour the caramels into a foil-lined 8×8 inch pan and let them cool completely. (Here’s where you’ll sprinkle them with coarse sea salt if you choose.)
- When the candy has completely cooled, you can cut the caramels into squares and wrap them in wax paper.
Expert Tips & Tricks
- This recipe creates roughly 20-30 caramels (depending on how large you cut them).
- Store wrapped caramels in an airtight container at room temperature.
- For additional richness and flavor, stir in 1/2 teaspoon vanilla after removing the caramel from the heat and before pouring it into your prepared pan.
- Want to add a little salty zing to your caramel? Sprinkle coarse sea salt on top of them after you pour them into a pan to cool.
Frequently Asked Questions
Once the caramels have cooled, you can cut them up and wrap in wax paper. I use wax paper because it will not stick to the caramels. Depending on what size you want to cut your candy you’ll want to cut squares or rectangles of wax paper the same shape as your caramels, and slightly larger (I give them about a half inch extra on each side).
Once you have all your wax paper cut, add a caramel to the center and roll the caramel up in it, then twist both ends tight to keep it secure.
Want to use your homemade caramel for more than just individual candies? You could:
– Make caramel apples by dipping and twirling apples into the caramel while it is still warm in the pot (put the apples on a stick or use a fork inserted into the top of the apples before dipping).
– Don’t want whole caramel apples? Slice apples up and put them in concentric rings on a plate and drizzle warm caramel over the top of them. Bonus: Sprinkle chocolate chips on top of the warm caramel over the apples before it cools for an extra treat.
– Have an ice cream social and pour warm caramel over the top of ice cream sundaes.
– Dip pretzel sticks into the caramel and then roll in sprinkles or chocolate chips or crushed candy.
– Add caramel to brownie batter before or after baking.
– Add a little square of caramel into the middle of a chocolate chip cookie before baking.
More Recipes for Caramel Lovers!
- Caramel Cookie Bars
- Salted Caramel Brownies
- Caramel Apple Dump Cake
- Salted Caramel Stuffed Double Chocolate Cookies
Did you make this recipe? FANTASTIC. Please rate the recipe below and be sure to tag me on social when you share a photo on social – I love seeing what you’re up to in the kitchen!

Easy 4 Ingredient Soft Caramels (no candy thermometer required)
Ingredients
- 1 ½ sticks butter , (12 tablespoons)
- ½ cup sugar
- 3 tablespoons light corn syrup
- 14 ounces sweetened condensed milk
- optional: coarse sea salt, ½ teaspoon vanilla , (see note)
Instructions
- In a medium sauce pan combine butter and sugar and stir over medium heat until melted. Stir in corn syrup and condensed milk.
- Bring to a boil and then decrease to simmer 7-10 minutes or until mixture achieves deep golden color, stirring constantly. (*For lower altitudes, simmer time may need to be reduced 2-3 minutes, watch carefully for coloring and read note!)
- Pour caramel into a foil-lined 8×8 inch pan and allow to cool completely. Sprinkle with coarse sea salt if desired.
- When completely cooled, cut into squares and wrap in wax paper.
Notes
Nutrition
Nutrition information is automatically calculated, so should only be used as an approximation.


I tried these a few weeks ago and they are fantastic! Great recipe, and stores well. Making some more for friends & family right now!! 🙂
I followed the recipe exactly and I stirred it constantly, I even had my husband on and stir when I need to put on a glove because my hand was getting hot and they are a wonderful color but they are really hard – nearly as hard a toffee but not hard break. It takes 10 minutes to eat one tiny piece. Did I do something wrong?
You may have cooked the caramel too long, when it reaches a golden color you pour it right in the pan. 🙂
When ever I do the dark golden brown it get to hard. I stop when it’s a light brown and it’s perfect.
Am converting your recipe to metric to make here in Germany. Are the 14oz of condensed milk fluid ounces or weight ounces please?
fluid ounces
yes the whisking! The butter separated out on top when I poured it into the 8×8 too. I quickly found the suggestion to whisk. I immediately poured it back into the warm pot and whisked away until it fully blended. I poured it back into the pan and it looks beautiful!
I tried the same thing and it worked. Definitely need to add the wisking step to this recipe.
Thanks.
Trying these today. Stirred constantly and had a nice simmer for a full ten minutes. The caramel was separating from the edges, but there was still a butter layer on top. I decanted it before pouring into the pan. It seems to be setting up fine. The batter tastes great and is delicious though not addictive. For my lifestyle these work well. I will definitely make them again, although I may try using less butter in the next batch
I just finished cooking a batch using this recipe. Just a note to those having issues with the butter separating….use a wisk to stir it!! I was using a spoon but it was separating as it was cooking so I grabbed a wisk and beat it like it owed me money 😉 it blended beautifully!! I took a small sample and ran cold water over it and it set up fine. Just keep wishing away girls and I’m sure it’ll stay together!!
Great recipe – we followed it to the letter and it worked perfectly! However, the caramel stuck terribly to the foil in the pan. The only change we will make next time is to line the pan with parchment paper, instead.
Hi, I had trouble with both parchment and tinfoil so ieended up spraying nonstick spray on the foil and it worked fantastically.
I tried these and had problems with the butter amount. I cooked it much longer and the butter didn’t mix in. I poured off about 1/3 c. They set up fine and were tasty. It is rainy here. Should I reduce the butter to 1 stick or continue to cook the mixture longer?
Hi Pam! Unforunately it’s not he amount of butter, it’s the weather and the altitude that are giving you trouble! 🙁
These sound great! But I live in Denmark so can you tell me approx how much a ‘stick’ of butter is?? I can’t wait to try these!
A stick is 8 tablespoons or 4 ounces. 🙂
salted or unsalted butter?
Doesn’t matter – I use salted!
i USED A STICK OF SALTED AND 1/2 STICK OF UNSALTED JUST BECAUSE i HAD IT LEFTOVER FROM ANOTHER RECIPE AND THEY CAME OUT JUST FINE
I don’t know where you buy your butter, but most butter comes in 8 ounce sticks, not 4 ounce. This can confuse people causing the recipe to get screwed up.
Hi Vee – not sure where you read 4 ounces in regards to the butter, I listed the butter in sticks/tablespoons. 🙂
A few comments up you said ounces, probably on accident. This is likely where she saw it
Whoops! Thanks Jess I’ll check that out!
Since four sticks of butter equals a pound (16 ounces), one stick is 4 ounces. The stick is 8 Tbsp of mass and also 4 ounces of weight.
Actually one stick of butter is 8 tablespoons which is 4 oz or 1/2 cup
If you live outside of the U.S., butter is measured using metric weights and measures…….and also one pound of butter = 4 sticks. Each stick is 4oz…….
Hi! How long do these keep? I am a make ahead type of girl and have all of my Christmas baking done. I’m assuming these wouldn’t freeze very well?
Thanks!
Hi Ashley, I haven’t frozen these but I’ve kept them chilled in the fridge for over a week and they were still great. 🙂